WinKontrol 2007
- Content
- Introduction
- Necessary HW and operating system
- Instructions for experienced PC users
- Installation
- First start and WinKontrol Program setting
- Working with WinKontrol Program
- Data
- Report
- New report
- Detailed report
- Brief report
- ANTI-VANDAL® report
- Scanner report
- ANTI-VANDAL® Report for scanner
- Report for guard
- Checkpoint report
- Checkpoint periodical report
- Route report
- Detailed route report
- Differing route report (with extra points)
- Differing route report (with missing points)
- Differing route report (missing and extra points)
- Aggregate route report
- Aggregate report for selected route
- Shift report
- Weekly report
- CSV report (.csv)
- Gates report
- Chip
- Settings
- Information
- Licence, warranty
- WK Downloader
- ANTI-VANDAL®
- Working with sensors
- Uninstalling
- Technical parameters
- Quick course for basic work
Report
The Reports menu controls creation of overviews from all entered and processed data in the control system. You may easily control the finished work of your guards through it. Individual records, described in detail can be found in this chapter. Each type of report will also show what such report looks like.
The recorded checkpoints and patrol officers are recognized by the program from the time, they are entered in the program and they cannot be recognized retroactively. As the result of this, it is impossible to retroactively enter patrol routes, shifts, etc. Only sensors are recognized retroactively.
All types of reports have the same control elements.
 |
Print will print a report. |
 |
HTML Export will convert the report to HTML format and will ask if you wish to save it |
 |
Increase font size will increase the size of the font in the report. |
 |
Decrease font size will decrease the size of the font in the report. |
 |
Reset font size will revert to the previous font size in the report |
 |
End closes the report. |
Interval
When creating all types of reports, besides shift and week reports, you will also encounter a similar first dialogue window, with the selection of interval. If you select any of the report, with the exception of those already mentioned - the shift and week reports, the following dialogue window will open.
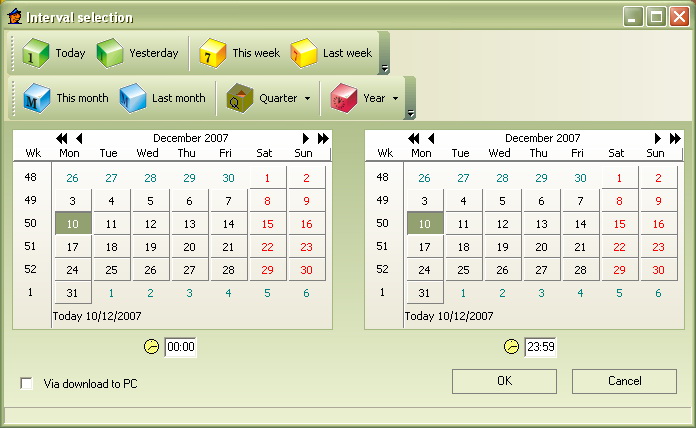
In this window, you may select for what time period should the program print out the data, and that will be done by several ways.
- With pre-set intervals: today, yesterday, this week, last week, this month, last month, quarter, a year, which you will select by simple click on the appropriate symbol. In the event of a quarter and a year, you also select even the specific times.
- Selecting starting and end dates, from / to, the reports should cover. These dates are entered in the tables From and To, by checking the appropriate days. You may also select even the exact time in field with clocks.
The selection As entered in PC provides for other, specific types of selection of data entered. If you opt for this selection, the program will show all transfers from data chips in the PC in the interval selected. Marking specific information and confirming by clicking OK, will select one type of data transfer.
Statistics
The next dialogue window you will encounter while creating reports, is statistics.

Statistics is only of information nature; it does not offer any selections. Opening statistics can be disabled in the Settings – Options window.
Statistic shows clear summary of a given report: type of report, time interval, number of entries about patrol officers, control chips, sensor and its number, ANTI-VANDAL® system information and other data. Close statistic by clicking on OK and then you will see the required report.
New report
This function represents new type of creating reports, which in the near future, will be completely replaced by the preset system of independent selections for individual type of reports. Moreover, it enables you to compile your own type of a report, where you may define, what type of information it should include, for what time period, etc.
Some selections are not yet accessible for now. They will be activated in the next program update.
The basic dialogue window will open when you click on  icon.
icon.
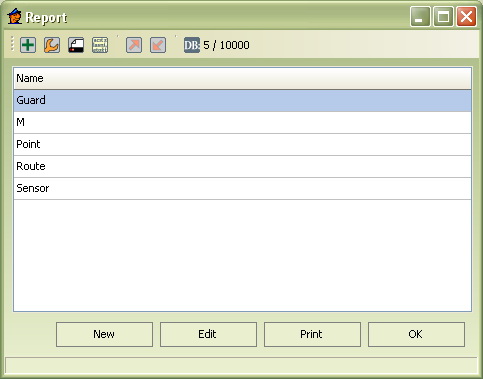
Four basic types of reports cannot be deleted or edited.
Double clicking on the name of the selected report will open it. The program will ask you to select a time interval (in your own case, it depends on the pre-sets, if the selection will appear). The report will open.
Reports contain several control elements.

Options
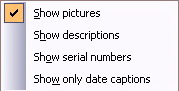
Independent of its settings, you may also show icons of individual entries – click on Show pictures.
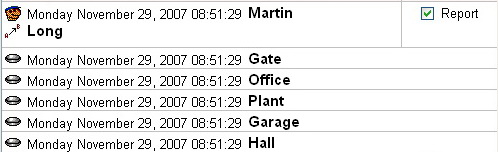
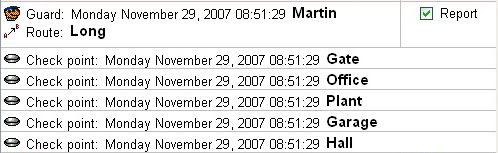
Show item’s detailed description – click on Show descriptions.
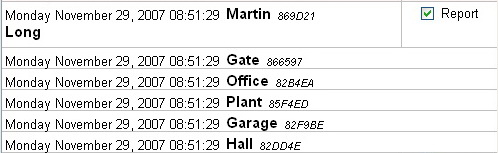
Show production numbers of all sensors and chips – click on Show production numbers.
Show only day headings and only time in individual items – check Show only day headings.
Clicking on Export will save the report in the CSV format.
Clicking on , the report closes.
The program already contains 4 pre-defined report types.
- Guard – guard report: reports all information related to the selected guard.
- Point – checkpoint report: reports all information related to the selected checkpoint.
- Route – route report: reports all information related to the selected route.
- Sensor – sensor report: reports all information related to the selected sensor.
In evaluating a patrol routes with missing points / extra points, are at a disadvantage, as compared with other, correctly downloaded routes.
Creating your own report
- Clicking on the
 icon, opens the main dialogue window of New Report.
 - Click on New.
- New dialogue window will open and will be opened on the first tab Report.
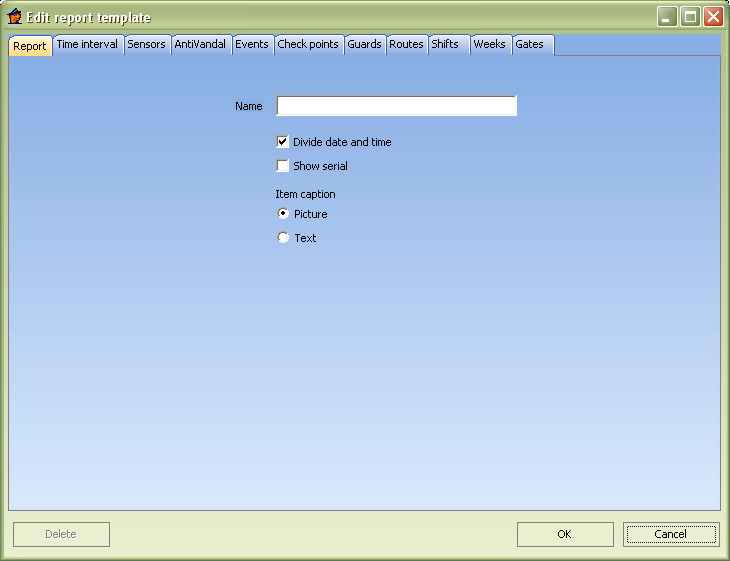
- In the field Name enter the name of your report.
- If you enter Divide date and time, items in the report will be separated in groups according to days and some items will only show time.

- If you do not check this selection, each item will show complete date and time.
- If you want the report to show the serial number, check the Show serial number item.
- If you do not check this selection, serial numbers will not show.
- In selection Item Name you may choose how the sensors, checkpoints, etc., will appear.
- Or as text.
- Click open another tab – Time interval.
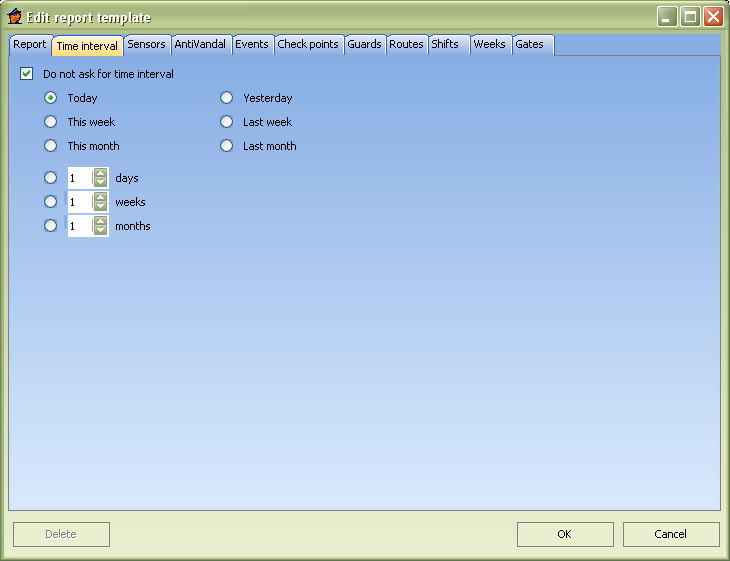
- If you leave the tab as is, the program will ask you every time you want to create a report, to identify the time interval, which the report should cover.
- If you check the Do not ask about time interval, other selections are activated and you may pre-set the time interval permanently: Click on the appropriate selection (Today, This week…).
- In specific number of days / weeks / months, you may change the count with the arrows.
- Click open next tab – Sensors or
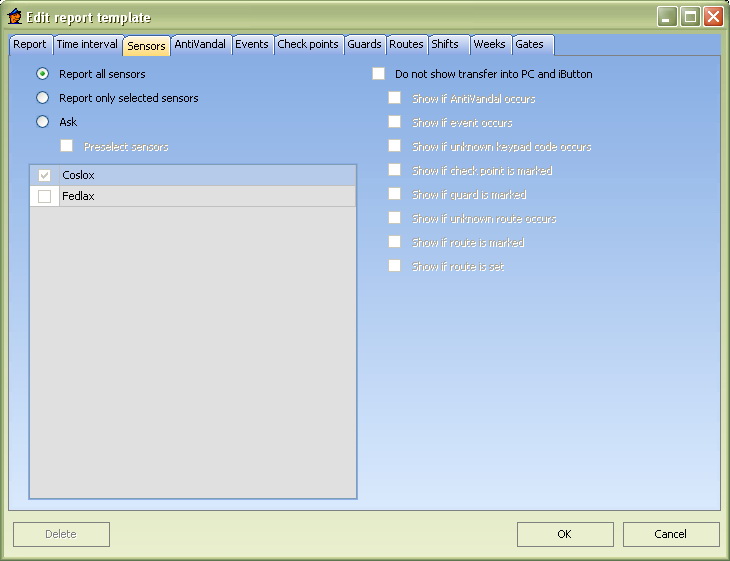 .
. - If you leave the tab as is, the program will generate reports for all sensors.
- Selecting Only report selected sensors will show the list of your sensors, that have been saved in the program. Check those, you wish to be shown in the generated report.
- If you check Ask, the program will ask you, which of the sensor you want the report to cover. .
- If you check the Pre-select sensors, the program will offer you only a report of those sensor’s data that you will select here.
- Click open another tab – Anti-Vandal®.
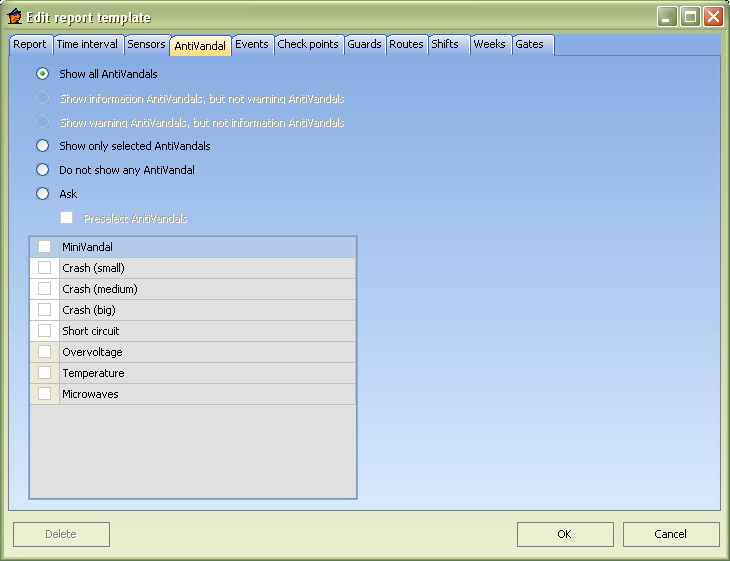
- If you leave the tab as is, the program will generate reports for all Anti-Vandal ® events. .
- If you check Show only selected Anti-Vandal® events, you may select from the list those Anti-Vandal® events you want the report to contain.
- If you check Do not show any Anti-Vandal® events, the Anti-Vandal® program will never show events in this report.
- If you check Ask, the program will ask you, which of the Anti-Vandal ® reports you want to show.
- If you check the Pre-select Anti-Vandal ® events, the program will offer you only those events you will select here.
- Click open another tab – Events.
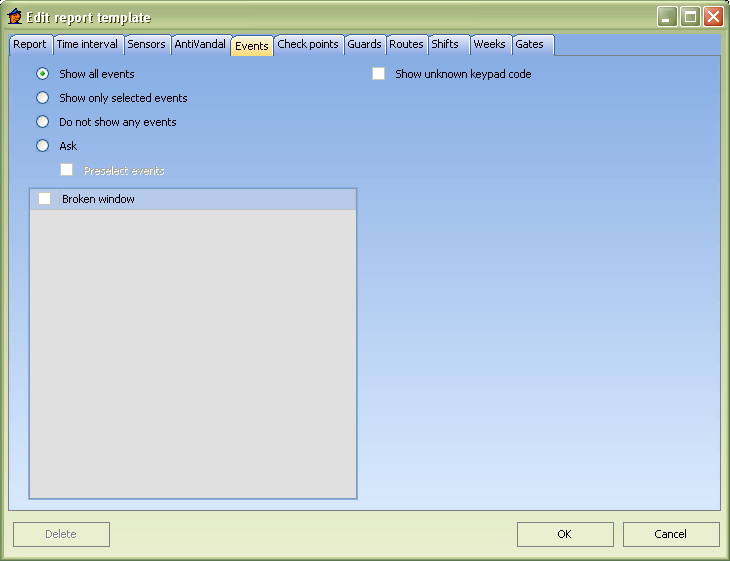
- If you leave the tab as is, the program will generate reports for all events. .
- If you check Show only selected Show only selected events, you may select from the list those events you want the report to contain.
- If you check Do not show any events, the program will never show any events in this record.
- If you check Ask, the program will ask you, if you want to show the events.
- If you check the Pre-select events, the program will offer you only a report of those events that you will select here.
- Click open another tab – Checkpoints.
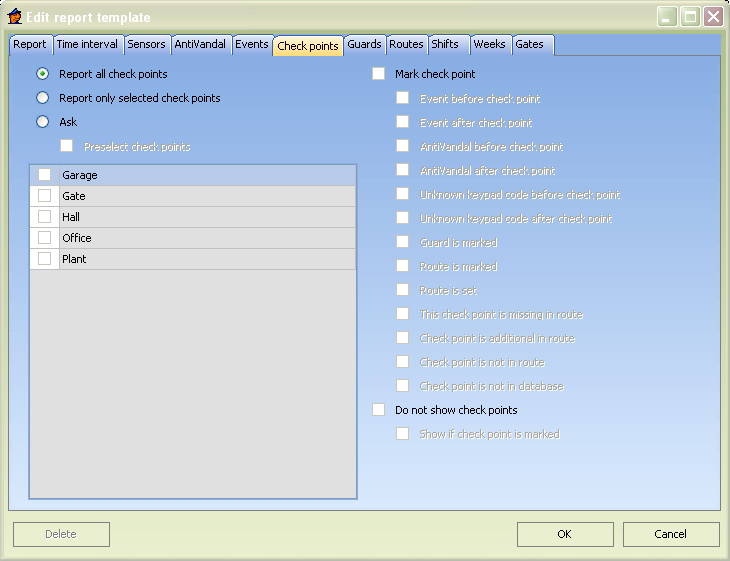
- If you leave the tab as is, the program will generate reports for all checkpoints.
- If you check Show only selected Show only selected checkpoints, you may select from the list those checkpoints you want the report to contain.
- If you check Ask, the program will ask you, if you want to show the checkpoints.
- If you check the Pre-select checkpoints, the program will offer you only a report of those checkpoints that you will select here.
- Click open another tab – Guards.
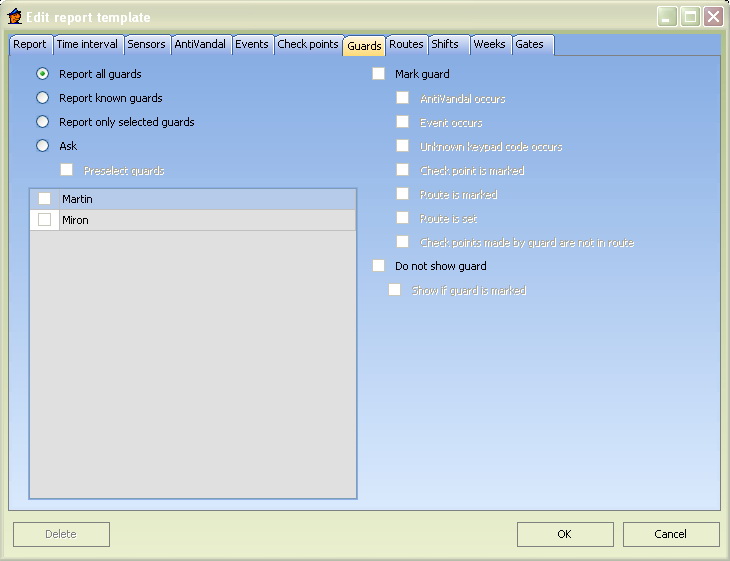
- If you leave the tab as is, the program will generate reports for all guards. .
- If you select Print known guards, the program will generate only those guards, that are saved in the program.
- If you checkReport only selected guards you may, in the list shown, designate those guards you wish the report to contain.
- If you check Ask, the program will ask you every time you generate this report, which guards you wish to print out. .
- If you check the Pre-select guards, the program will offer you only a report of those guards that you will select here.
- Click open another tab – Routes.
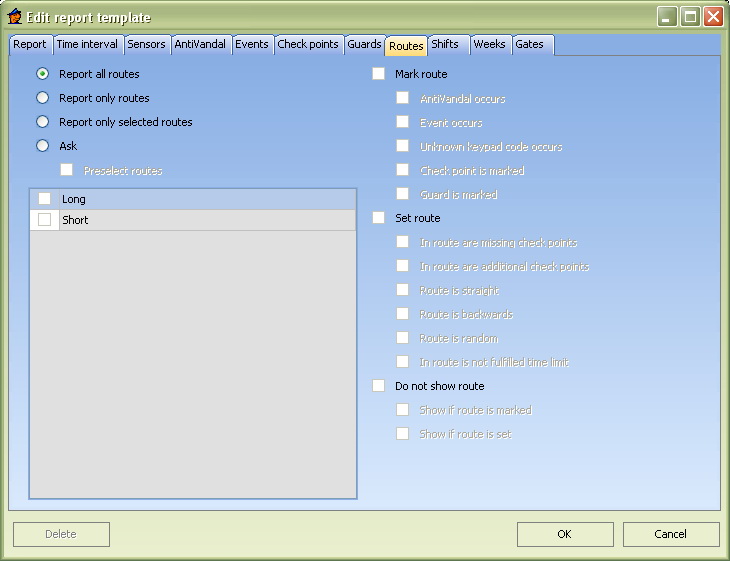
- If you leave the tab as is, the program will generate reports for all routes. .
- If you select Print known routes, the program will generate only those routes, that are saved in the program.
- If you check Report only selected routes, you may, in the list shown, designate those routes you wish the report to contain.
- If you check Ask, the program will ask you every time you generate this report, which routes you wish to print out. .
- If you check the Pre-select routes, the program will offer you only a report of those routes that you select here.
- Click open another tab – Shifts.
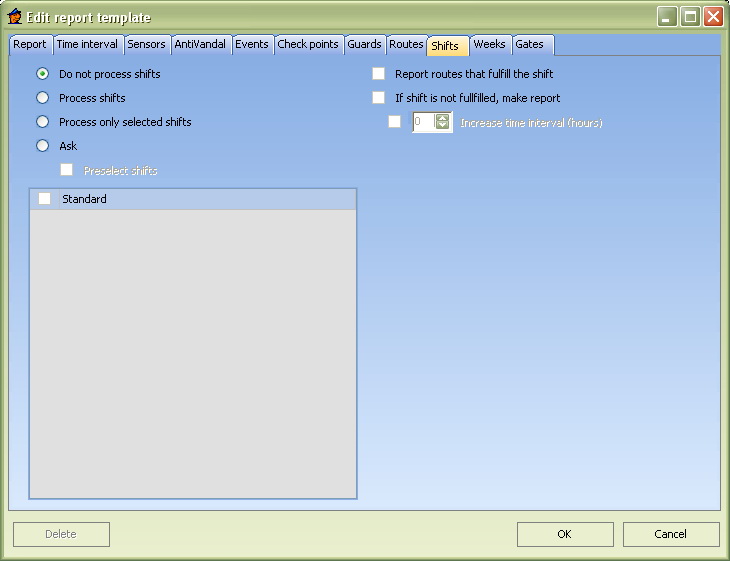
- If you leave this tab as is, the program will not process the shifts.
- If you check Process shifts, you allow processing shifts every time this type of report is generated.
- If you check Report only selected shifts, you may, designate those guards you wish the report to contain from the list shown.
- If you check Ask, the program will ask you every time you generate this report, which shifts you wish to print out. .
- If you check the Pre-select shifts, the program will offer you only a report of those shifts that you will select here.
- Click open another tab – Weeks .
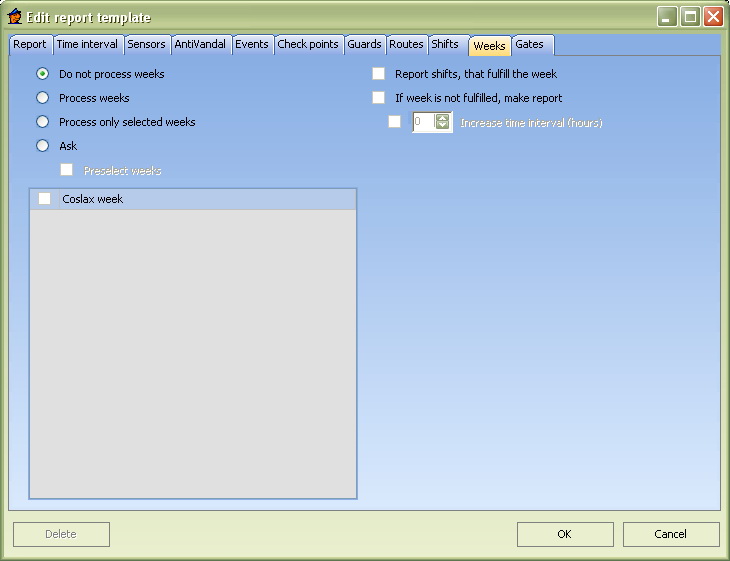
- If you leave this tab as is, weeks in the program will not be processed.
- If you check Process weeks, you allow processing weeks every time this type of report is generated.
- If you check Report only selected weeks, you may, designate those weeks, you wish the report to contain from the list shown.
- If you check Ask, the program will ask you every time you generate this report, which weeks you wish to print out.
- If you check the Pre-select weeks , the program will offer you only a report of those weeks that you will select here.
- Click open another tab – Gates.
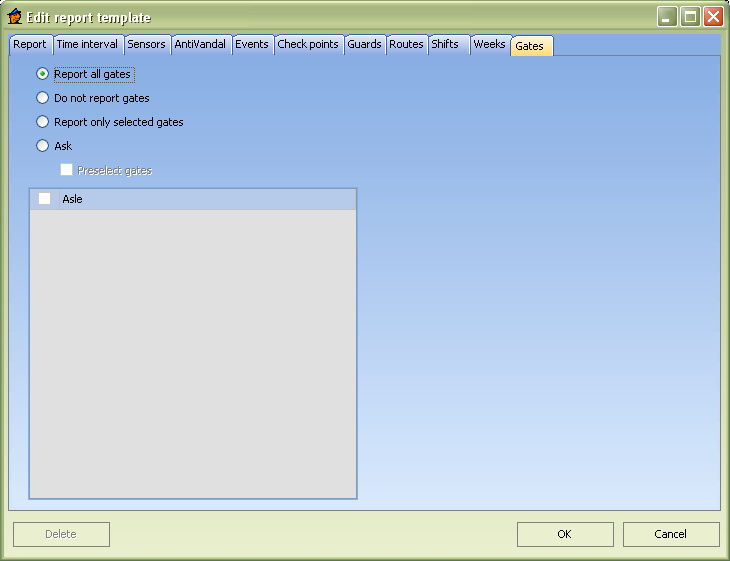
- If you leave this tab as is, the program will generate reports of traffic for all gates.
- If you check Do not report gates, the program will not generate any information about the gates traffic.
- If you check Print out only selected gates, you may select from the list only those gates you want the report generated for.
- If you check Ask, the program will ask you every time, which gates you wish to report on.
- Moreover, if you select Pre-select gates, the program will offer only those gates you designate here.
- Clicking OK, you confirm generating new report.
Detailed report
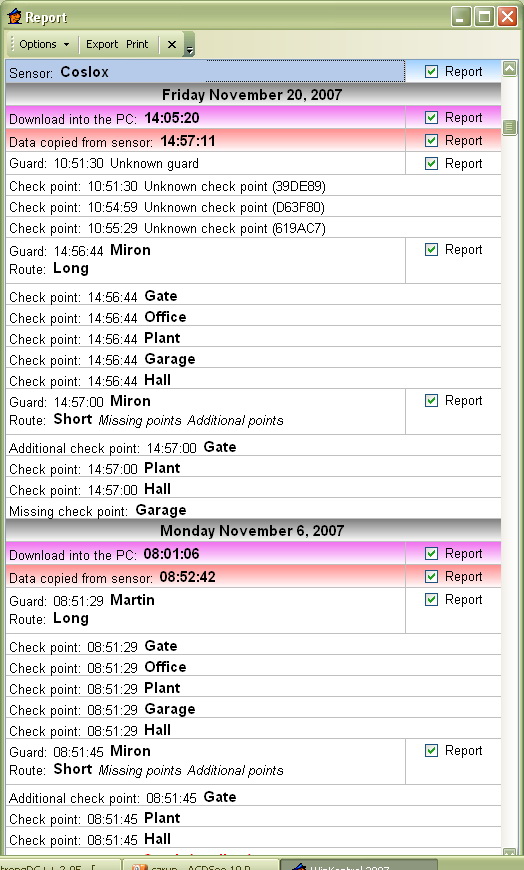
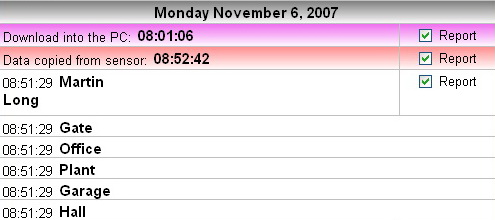
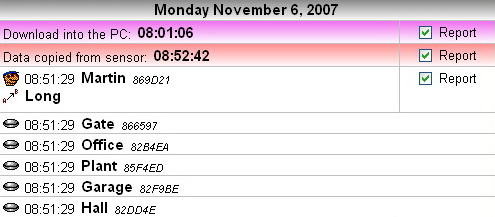
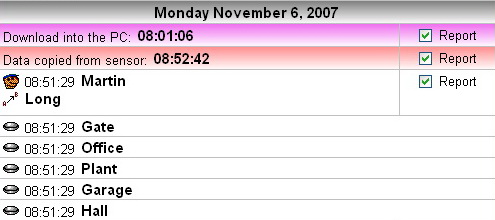
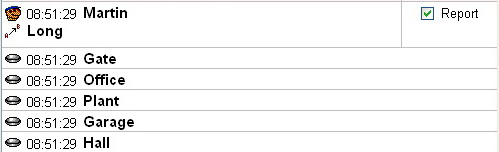
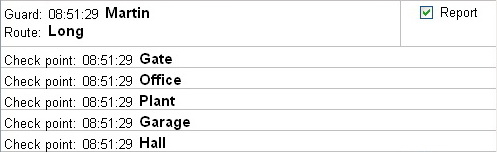
Detailed report is any basic report, as it contains complete information about the patrol system. This report shows all data entered in a given time period: individual checkpoints, guard information, route information, all records from the Anti-Vandal ® system and when the data was entered in the PC, etc.
- You will call up the report by clicking on Detailed report item or the
 icon, a dialogue window for interval selection will open.
 - After selecting the interval, you will see report statistics. .
- Clicking on OK, the report itself will show.
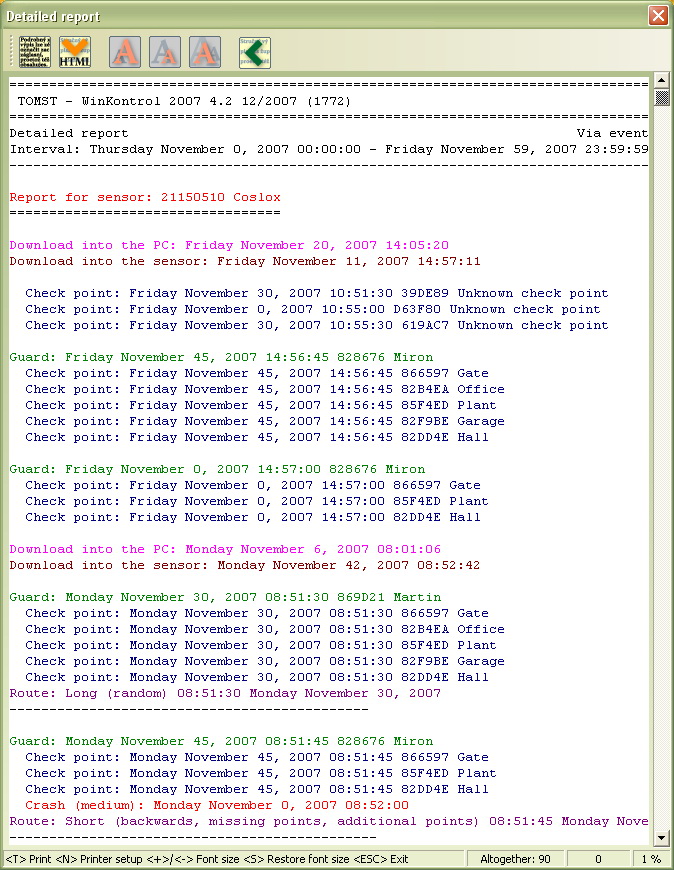
Example use: Detailed report is the best type in the event you don’t have patrol routes entered and you need to show the list of all downloaded checkpoints. It will also be of use, if the guard insists that he / she covered the route, but made mistakes in sequence and this is why the route does not show in reports. In this case, you may want to verify the guard’s statement by checking the Detailed Report.
Brief report
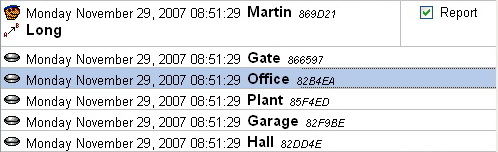
A brief report will show only the basic overview of entered data. It does not report on any checkpoints, it only shows the guard’s name and the route information, Anti-Vandal® information and relevant time information. For easy use and control, we recommend entering the routes system since it is the routes themselves and their correct coverage that this report describes first and foremost. The program then informs you with single line, if the route has been covered and how.
- You will call up the report by clicking on Brief report item or the
 icon, a dialogue window for Interval Selection will open.
 - After selecting the interval, the report statistics will open. .
- Clicking on OK, the report itself will show.

Tip: If you click in the report and press the space bar, the program will enable you to designate one specific item and after pressing the Enter key, you will get its detailed report.
Example use: A brief report is ideal for quick control. Individual checkpoints are not printed out, only the guard’s name, time of data entry into the PC and event recorded by keypad / chip. If you have a system of routes in the program, the Brief report will clear information about the route (time, and if it was correctly covered).
Anti-Vandal®report
This report serves for clear showing of information from the Anti-Vandal ® system from your sensors. You will clearly see, when and how did the guard try to damage the sensor.
Identification of a specific guard is subject to the guard’s placing his identification chip to the sensor, before each route.
- You start the report by clicking on the Anti-Vandal® report item, or on the
 icon, a dialogue window for interval selection will open.
 - After selecting the interval, report statistic will open. .
- Clicking on OK, the report will open.
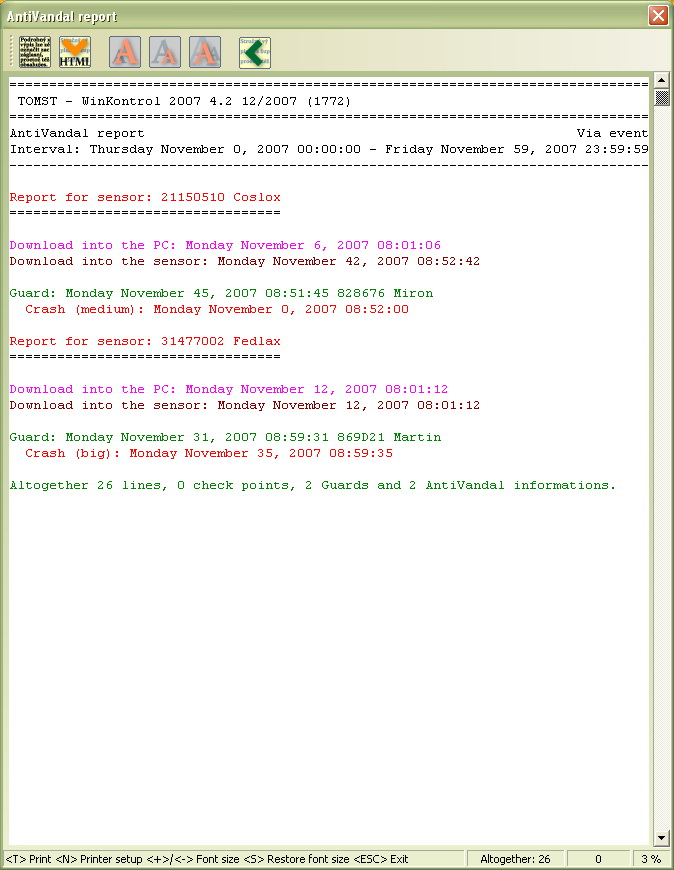
Example use: You suspect that guards are trying to intentionally damage the sensors; this report will give you detailed information from the Anti-Vandal ® system for a period selected, including the names of guards attempted that and when.
Sensor report
This type of report is used to show data downloaded by one specific sensor. Its structure is same as in detailed report.
- Report is open by clicking on Sensor reportor the
 icon, when a dialogue window opens for interval selection.
 - In the next dialogue window, highlight sensor you wish to check and click on OK.
- After selecting the interval, report statistics will open. .
- Clicking on OK, the report will open.
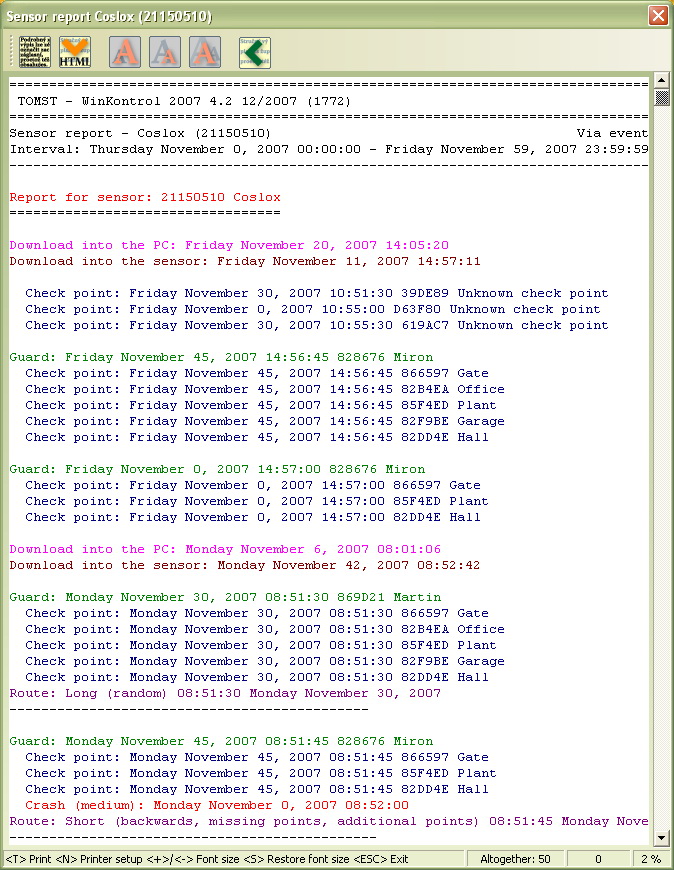
Example use: if you wish to check detailed data, read by one particular sensor. For example, a sensor assigned to the shift, where you suspect it does not do the job the way it should.
Anti-Vandal ® sensor report
Anti-Vandal® report for sensor is similar as Anti-Vandal ® report, but data is written only from one specific sensor.
- Report is open by clicking on Anti-Vandal® report for sensor item, or the
 icon. A dialogue window for the interval selection will open.
 - In the next dialogue window, highlight sensor you wish to check and click on OK.
- After selecting the interval, report statistics will open.
- Clicking on OK, the report will open.
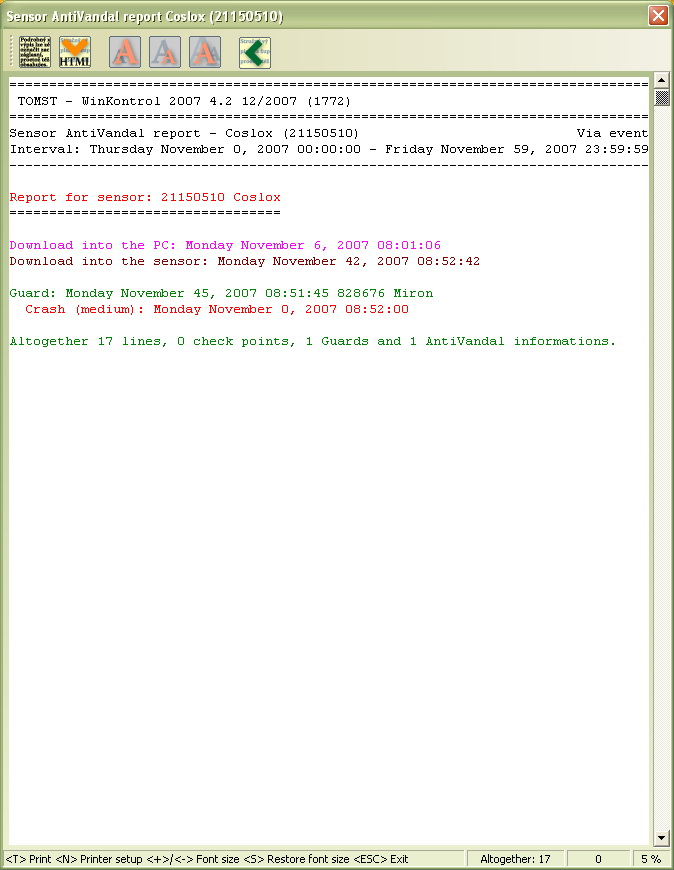
Example use: If, for example, you suspect that certain shift is trying to destroy its assigned sensor, then this type of report is ideal for you. . It will show the Anti-Vandal ® systen information of particular sensor for a specified time period.
Guard report
This type of report is used to show downloaded data of one specific guard.
- Report is open by clicking on Guard report or the
 icon, when a dialogue window for interval selection opens.
 - In the next dialogue window, highlight the guard you wish to check out and click on OK.
- After selecting the interval, report statistics will open.
- Clicking on OK, the report will open.
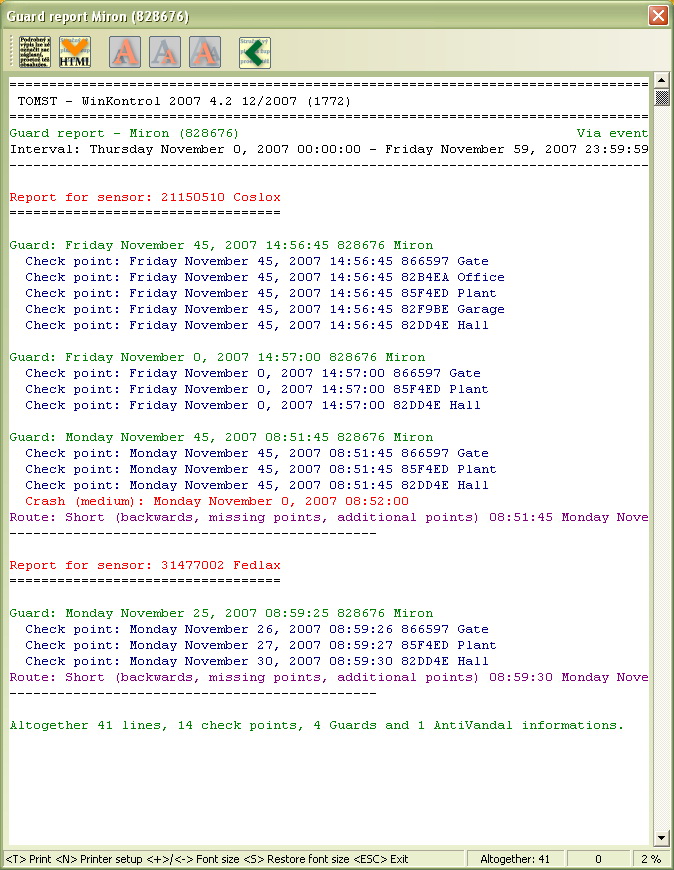
Example use: If you wish to check the work of one of your guards: for example, if you wish to reprimand him / her, you will need a solid proof about his / her bad job.
Checkpoint report
Checkpoint report clearly shows, which guard and with what sensor checked in at the selected checkpoints.
- Open the report by clicking on Checkpoint report item, or the relevant icon
 will open in dialogue window for interval selection.
 - In the following dialogue window, highlight the checkpoint you wish to check and confirm by clicking OK.
- After selecting the required interval, report statistics will open.
- Clicking on OK, the report will open.
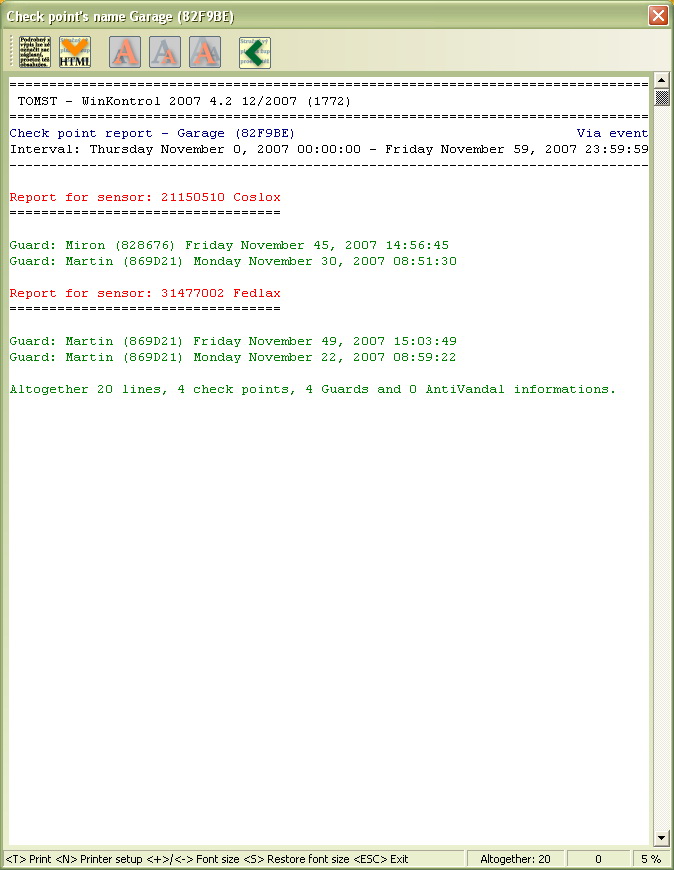
Sample use: If, for example, an unusual situation occurs, and you need to check who and when had controlled the checkpoint in the next immediate vicinity.
Checkpoint interval report
This report will help you determine if the selected checkpoint was controlled by the guard in the time fram eselected.
- Open the report by clicking on Checkpoint interval report item, or the relevant icon
 will open in dialogue window for interval selection.
 - In the following dialogue window, highlight the checkpoint you wish to check and confirm by clicking OK.
- Dialogue window will open.
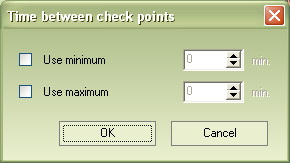
- If you wish to select minimum and maximum times withing which a checkpoint should be controlled, check Use minimum as well as Use maximum.
- Using arrows, select the required time information (in minutes) and confirm by clicking OK.
- If you wish to set only mininum or maximum times between downloading a given checkpoint, check and using the arrows, define one of the selections and confirm by clicking OK.
- After selecting the required interval, report statistics will open.
- Clicking on OK, the report will open.
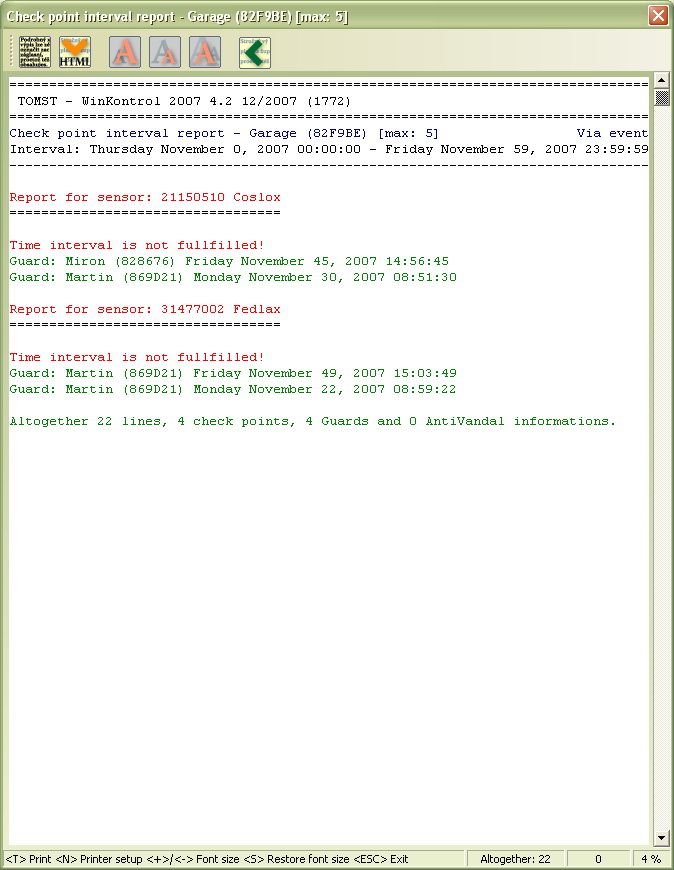
Sample use: This type of report will help you verify, if the selected point is checked often enough so that you could eventually make changes to routes / shifts of your guards.
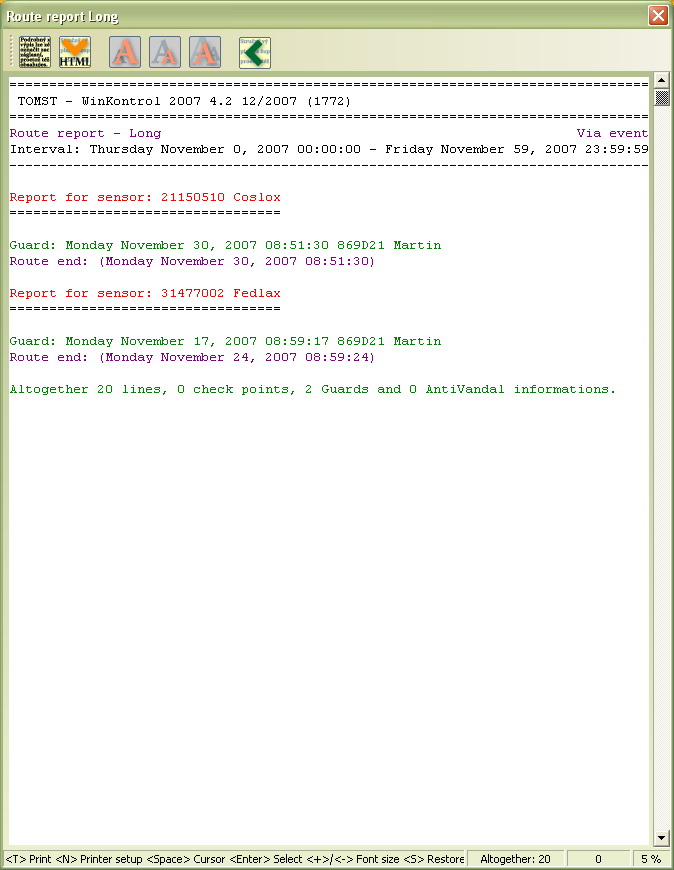
Route report
The type of report will show clearly, brief information about a specific and correctly downloaded route.
If the guard insist that he / she had covered the route but made an error and you do not see the route in the report, you may locate it through Detailed Report.
- Open the report by clicking on Route report item, or the relevant icon
 will open in dialogue window for interval selection.
 - In the following dialogue window, highlight the route you wish to check and confirm by clicking OK.
- After selecting the required interval, report statistic will open.
- Clicking on OK will open the report.
Tip: If you click anywhere in the report and press the spacebar on the keyboard, the program will highlight one specific item and after hitting the Enter key, its detailed report will open.
Sample use: Route report may be used for simple check of your guards' work. Report for a given time period shows detailed information about routes covered, relevant time information and whether or not the route was without incidents.
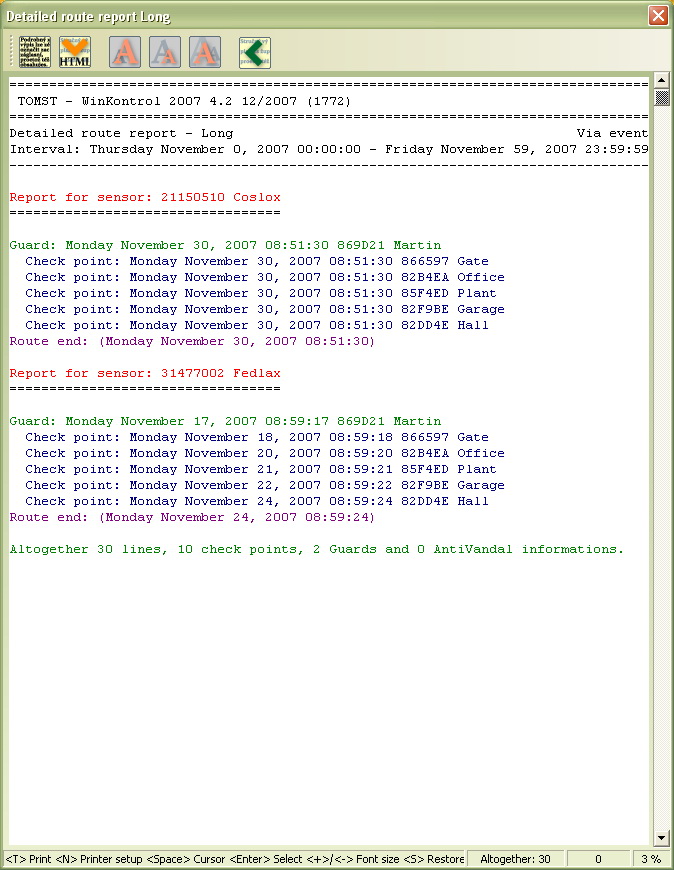
Detailed route report
As opposed to the Route report, the Detailed route report displays information about a specific route in detail, including individual checkpoints.
- Open the report by clicking on Detailed route report item, or the relevant icon
 will open in dialogue window for interval selection.
 - In the following dialogue window, highlight the route you wish to check and confirm by clicking OK.
- After selecting the required interval, report statistic will open.
- Clicking on OK will open the report.
Tip: If you click anywhere in the report and press the spacebar on the keyboard, the program will highlight one specific item and after hitting the Enter key, its detailed report will open.
Sample use: If you wish to check routes covered, including individual checkpoints, included in those routes.
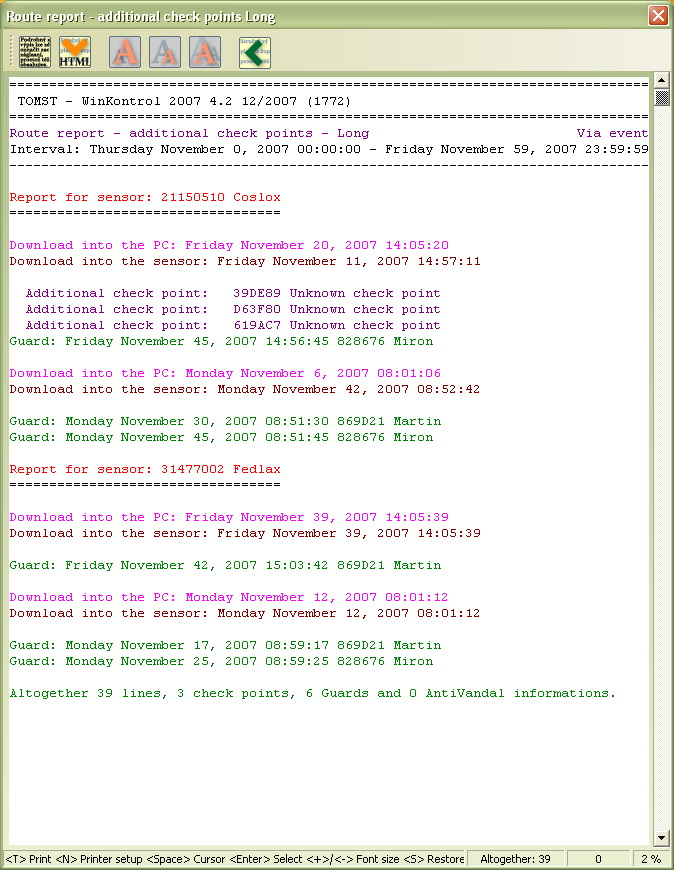
Route report with additional checkpoints
This type of report will search out and display checkpoints that do not belong in the selected route but the guard had nevertheless downloaded them. The checkpoints list also the guard, who has made this error.
Note: Moreover, if the downloaded checkpoint is not registered in the program, it will write out only its number and is designated as an Unknown checkpoint.
- Open the report by clicking on Route report with additional checkpoints item, or the relevant icon
 will open in dialogue window for interval selection.
 - In the following dialogue window, highlight the route you wish to check and confirm by clicking OK.
- After selecting the required interval, report statistic will open.
- Clicking on OK will open the report.
Tip: If you click anywhere in the report and press the spacebar on the keyboard, the program will highlight one specific item and after hitting the Enter key, its detailed report will open.
Sample use: If the guard had reported that he / she had also downloaded checkpoints not belonging to the route in error, you may verify his / her statement with this report.
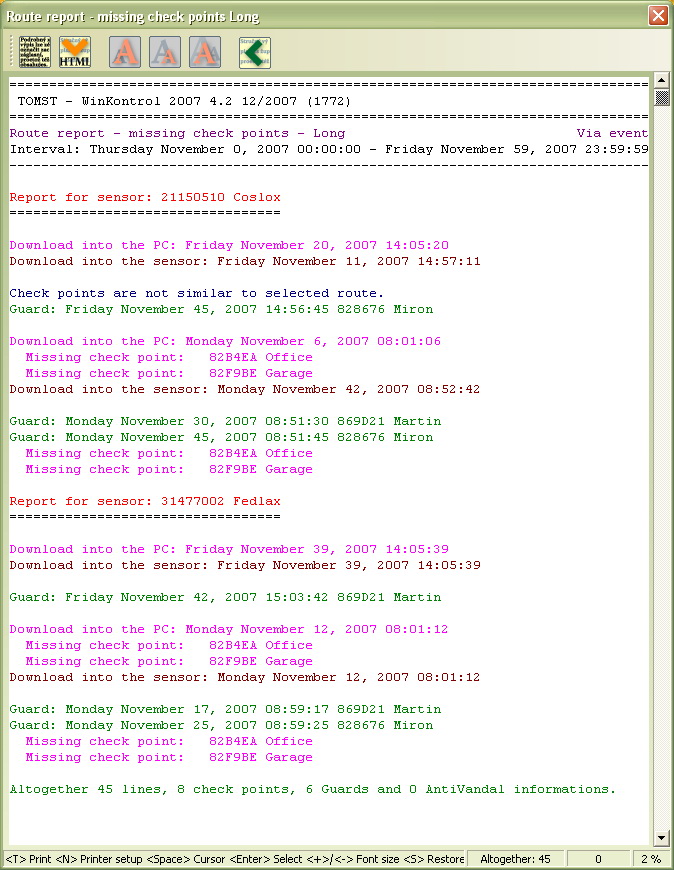
Route report with missing checkpoints
This type of report will search out and display checkpoints that do belong in the selected route but the guard had not canned them in. The checkpoints report lists also the guard, who has made this error.
A route may not be missing more than 2, or rather 10% of checkpoints. If there are more checkpoints missing, the program will not be able to indenfify the route. The Route report with missing checkpoints will state that Checkpoints do not match the selected route.
You may pre-set a missing points limit in Options.
- Open the report by clicking on Route report with missing checkpoints item, or the relevant icon
 will open in dialogue window for interval selection.
 - In the following dialogue window, highlight the route you wish to check and confirm by clicking OK.
- After selecting the required interval, report statistics will open.
- Clicking on OK will open the report.
Tip: If you click anywhere in the report and press the spacebar on the keyboard, the program will highlight one specific item and after hitting the Enter key, its detailed report will open.
Sample use: If the guard reports to you that he / she had not downloaded some checkpoints in error, but had otherwise covered the route, you may check his / her statement with this report (or a detailed report).
Missing checkpoints
Routes with missing checkpoints are somewhat more complicated so this is why we present only some illustrative points. Illustrative, properly downloaded route looks as follows (the letters represent 20 checkpoints in the correct sequence).
A – B – C – D – E – F –G – H – I – J – K – L – M – N – O – P – Q – R – S – T
Example 1
Possible number of missing checkpoints in the route is in the initial settings. 2 checkpoints and 10% The guard will download during his / her walk:
A – E – F – G – H – I – J – K – L – M – N – O – P – Q – R – S – T
(The Guard had missed 3 checkpoints out of 20).
There are more than 2 and more than 10% = route will not be recognized and the program will designate it as Unknown.
Example 2
You have changed the possible number of missing checkpoints in the route to 3 and 10%. The guard will download the checkpoints in the same way as in the first example (there are 3 checkpoints missing out of 20).
10% of checkpoints is exceedded, but there are only 3 permitted checkpoints = route will be recognized. In evaluating route, the program always selects the lesser of both limitations.
Example 3
You have changed the possible number of missing checkpoints in the route to 3 and 20%. The guard will download the checkpoints in the same way as in the first example (there are 3 checkpoints missing out of 20).
No maximum number of permissible missing checkpoints had been exceeded = route will be recognized.
It is inappropriate to pre-set lower limits without reason for route recognition. Minimum number of checkpoints is also the minimum number of checkpoints in the route (it is greater by at least one). In pre-setting the number of missing checkpoints to 3, it does not make sense to enter routes with less than four checkpoints. The system would always consider them as completed; all checkpoints may be missing from the route. The inner logic of the program considers such route for very inappropriate and will show preference for other (routes) where possible. If however, a more suitable route is not found (two unknown checkpoints), it will declare (as up to three checkpoints may be missing) that this short route had been completed. The shortest route in the system should be greater by at least one than the maximum number of missing checkpoints. Second setting (percentage of checkpoints which are permitted to be missing) does has no influence on route recognition; it speeds up data processing.
Example 4
Illustrative, properly downloaded route looks as follows (the letters represent 26 checkpoints in the correct sequence).
A – B – C – D – E – F –G – H – I – J – K – L – M – N – O – P – Q – R – S – T – U – V – W – X – Y – Z
10% and 2 missing checkpoints are permitted. The guard will download the checkpoints:
A – E – F – G – H – I – J – K – L – M – N – O – P – Q – R – S – T – U – V – W – X – Y – Z
(Again, 3 checkpoints in sequence are missing).There are 3 checkpoints missing but less than 10% of the whole number = route will be recognized.
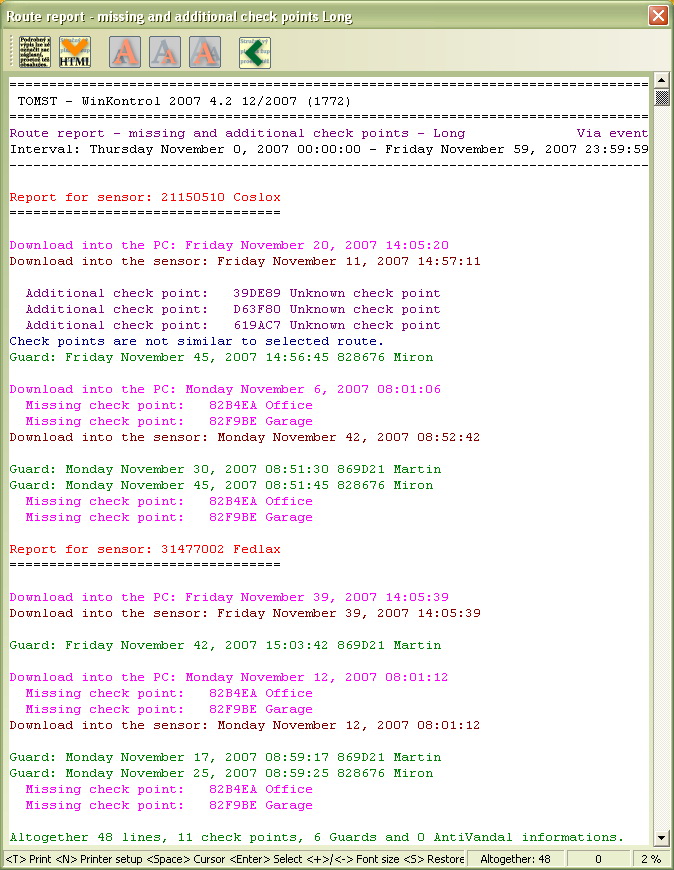
Route report (with missing and extra checkpoints)
This report will search out checkpoints that do belong in the route, but were not download by the guard and at the same time, checkpoints that do not belong in the route, were still download by the guard. In other words, this report is a combination of two preceding types of report.
- Open the report by clicking on Route report with missing and additional checkpoints item, or the relevant icon
 will open in dialogue window for interval selection.
 - In the following dialogue window, highlight the route you wish to check and confirm by clicking OK.
- After selecting the required interval, report statistic will open.
- Clicking on OK will open the report.
Tip: If you click anywhere in the report and press the spacebar on the keyboard, the program will highlight one specific item and after hitting the Enter key, its detailed report will open.
Sample use: If the guard had reported that he / she had also downloaded checkpoints that do not belong in the route and did not download checkpoints that do belong there, you may verify his / her statement with this report (or a detailed report).
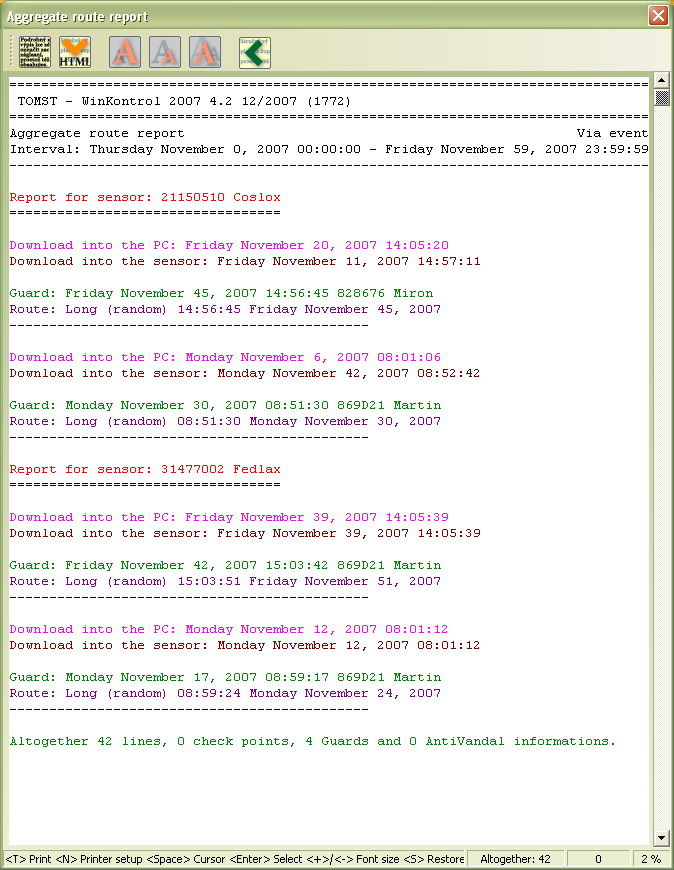
Aggregate route report
Aggregate report will print out routes without consideration of checkpoints sequence, that is, in case where all checkpoints were downloaded in but the guard did not download them in in the correct sequence.
Processing this type of report takes a whole longer, as the program checks many combinations.
- Open the report by clicking on Aggregate route report item, or the relevant icon
 will open in dialogue window for interval selection.
 - In the following dialogue window, highlight the route you wish to check and confirm by clicking OK.
- After selecting the required interval, report statistic will open.
- Clicking on OK will open the report.
Tip: If you click anywhere in the report and press the spacebar on the keyboard, the program will highlight one specific item and after hitting the Enter key, its detailed report will open.
Sample use: If the guard reports to you that he / she had downloaded the route in the wrong sequence, but has otherwise covered the route, you may verify his / her statement with this report.
Aggregate report for selected route
Will print out one selected route, without regard for sequence of checkpoints, i.e. checkpoints may be downloaded randomly. This report, different from the preceding one, is used in cases you wish to search out a specific route, where the guard had made a mistake and downloaded the checkpoints in the wrong sequence.
- Open the report by clicking on Aggregate report for selected route item, or the relevant icon
 will open in dialogue window for interval selection.
 - In the following dialogue window, highlight the route you wish to check and confirm by clicking OK.
- After selecting the required interval, report statistic will open.
- Clicking on OK will open the report.

Tip: If you click anywhere in the report and press the spacebar on the keyboard, the program will highlight one specific item and after hitting the Enter key, its detailed report will open.
If the guard reports to you that he / she had downloaded the route in the wrong sequence and you know the route in question, you may verify his / her statement with this report.
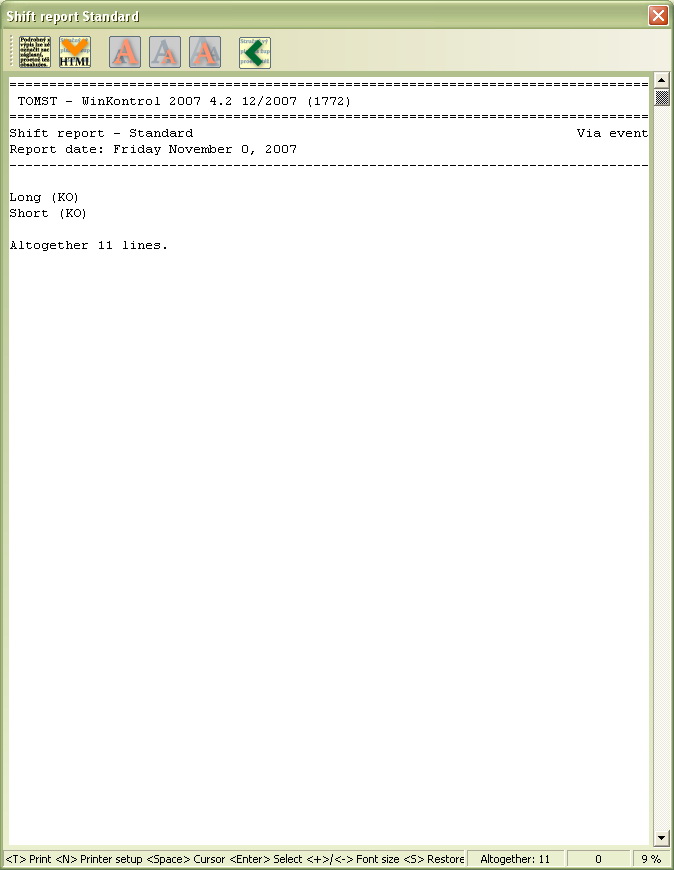
Shift report
Shift report displays the accuracy of route coverage by specific shift for specific day. It represents easy means for daily control of the guards' work.
- Open the report by clicking on Shift report or the appropriate
 icon.
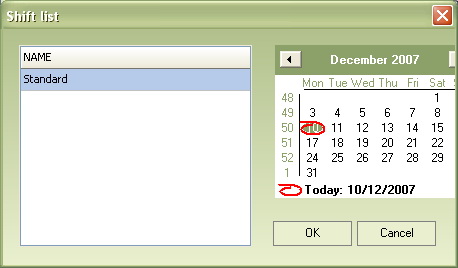
icon. - Dialogue window will open.

- Highlight the shift and date for which you wish to retrieve the data for.
- Clicking on OK will open the report.
Tip: If you click anywhere in the report and press the spacebar on the keyboard, the program will highlight one specific item and after hitting the Enter key, its detailed report will open.
Sample use: Shif report is an ideal tool for fast and simple control. It only shows brief information about routes belonging in the shift and if they were properly covered (designated OK) or not (KO).
Week report
Will print out list of shifts for selected week and if they were any incidents (designated OK) or not (KO). Represents an easy weekly conrol of guards' work.
- Open the report by clicking on Shift report or the appropriate
 icon.
icon. - Dialogue window will open.
- Highlight the Monday, the first day of the week where you wish to check the shifts.
- Clicking on OK will open the report.
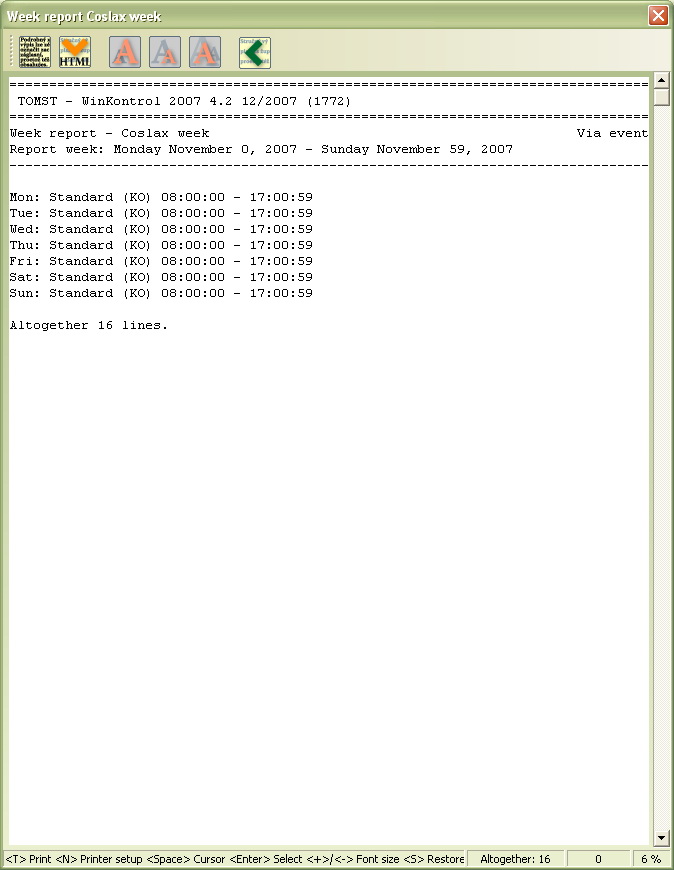
In case you highlight another weekday, the system will automatically shift the start of the time interval to the previous Monday. You will be informed of this change by notification Date has been moved to Monday, which you may close by clicking on OK.
Tip: If you click anywhere in the report and press the spacebar on the keyboard, the program will highlight one specific item and after hitting the Enter key, its detailed report will open.
Sample use: Shif report is an ideal tool for fast and simple control. It shows only brief information about shifts, belonging in that week and whether or not they were properly covered.
CSV print-out
This will transfer downloaded events into Excel.
- Click on CSV (.csv) print-out.
- In the open dialogue window, name the file being saved and where it should be saved.
- Confirm by Save.
- A dialogue window for interval selection will open.
- Clicking on OK will generate a report.
Gates report
This report illustrates attendance.
- Click on Gates report or an appropriate
 icon.
icon. - The following dialogue window will open.
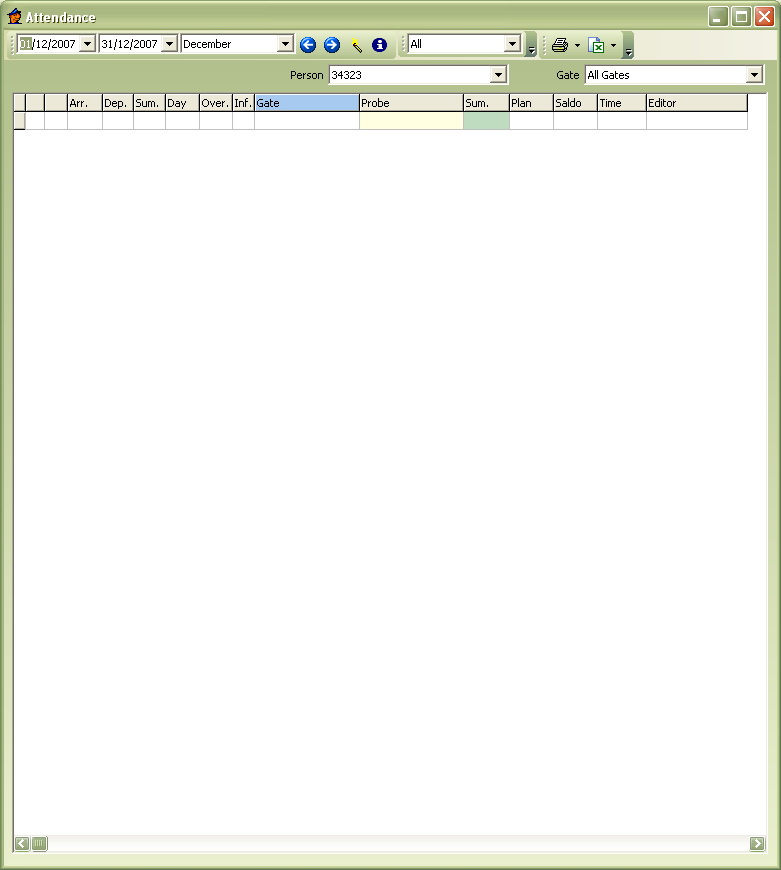
- In the upper part, select time interval for which data should be printed. You may select specific data - in the first field starting date, in the second field the final date, or in the third field, select the month and data will be automatically set on the first and last day of that month. The blue arrows next to the colum, may be used to browse in the months.
Maximum possible interval is one month.
 icon starts generating attendance report.
 icon shows summary results.
- In the next column, you may select if you wish to print out:
- all, therefore all data entered,
- attendance only,
- only attendance summary,
- only information, therefore data from probes, set only as informative ones.
- The last two icons on the upper bar, provide for printing out the report and saving the file in Excel format.
- In the left column of the bottom bar, you select the individual, whose attendance you wish to show.
- In the right column of the bottom bar you select if you wish to show data from all gates or only from a specific one gate.
| Up | Next |
|---|