WinKontrol 2007
- Content
- Introduction
- Necessary HW and operating system
- Instructions for experienced PC users
- Installation
- First start and WinKontrol Program setting
- Working with WinKontrol Program
- Data
- Report
- Chip
- Settings
- Information
- Licence, warranty
- WK Downloader
- ANTI-VANDAL®
- Working with sensors
- Uninstalling
- Technical parameters
- Quick course for basic work
Settings
In the section Settings, you can configure the WinKontrol program. It will enable you to adapt its appearance and functions for easy work with the program.
Adapter
In adapter settings, you select the adapter type and the port through which it is connected. More about adapter installation. More about adapter installation.
In case of TMD adapter, there is no need to set the port number.
The adapter serial number is also used as licensing key. Therefore for full software function, the adapter must be installed and properly pre-set in the WinKontrol program before any actual work with the program starts. Without connected and correctly pre-set adapter, the program will only work in trial mode.
Language
In this section, you select the language you will use in working with the software.
- If you wish to change the present language settings, click on Language.
- Dialogue window will open.
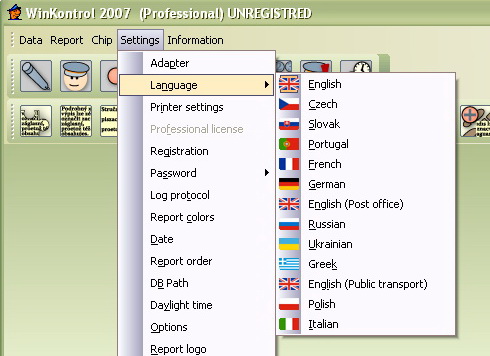
- In the menu, select the required language.
- The program has to be re-started.
- The next time the program starts, WinKontrol will communicate in the language selected.
Print settings
In this selection, configure the print parameters: the printer used, paper orientation, its size, etc. Depending on the settings, the software will print reports, for example.
- Click on Print settings.
- Dialogue window will open.
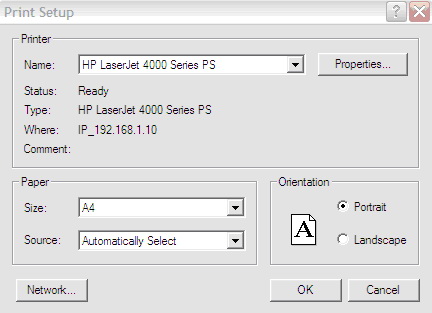
The program uses print settings from the Windows operating system.
- Confirgure it by the type of printer and the required appearance of documents.
- Confirm by clicking OK.
Professional Licence
In this selection, enter your Professional license number. You have received your License Number from your distributor or you will find it enclosed with the CD WinControl.
If you own this license, click on Professional License . A window to enter the license number will appear 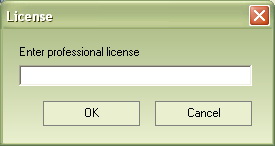 . Enter the license number. After entering the number, the program will require re-start.
Registration
We recommend the users of our control system and WinKontrol program to register. Registration will entitle you to many advantages, such as free automatic program update. Another advantage is in providing customer support, available only to registered users. Moreover, registered users will be informed immediately about all available firmware upgrades for sensors, just like in our other new products and specials. Registration takes place over the Internet or via e-mail (e-mail registration takes longer).
- Click on Registration.
- The following dialogue window will open.
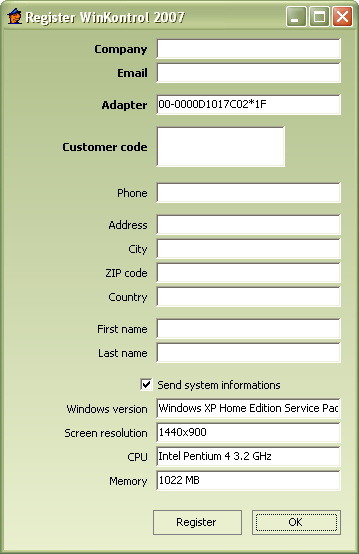
- Fill in the on-screen form.
Registration and assigning you a customer number relates closely to your name of the company, serial number of the adapter and e-mail address. This why these items must be completed. We recommend you complete all fields in the on-line form and check Send all system information. (Tthis information is very useful to our technical support, who are then better equipped to give you fast and better advice.
Serial number of your adapter appears automatically. Enter the customer code only if you've had one assigned to you.
- For on-line registration, click on Registration. The program will then register you immediately and your registration code will appear.
In on-line registration, your PC must be connected to the Internet.
- You will receive the code to your e-mail address. Enter the code in the customer code field.
- Confirm by clicking OK.
Password
Access to the WinKontrol program can be password protected. The section contains two options.
- Change your password. Clicking on this item, a dialogue window will open, enabling you to enter a new or change the existing password of the currently registered user.
Person with administrator's rights for the WinKontrol program, may change the password of any user through User management.
- User management. In this selection, you may add other WinKontrol users, set their rights and give them the right of access to the program.
This function is available only to the Professional License holders and only to those individuals holding administrator's rights for the WinKontrol © program.
User management
Clicking on User management, a basic dialogue window will open. You are now looking at the latest list of registered users.
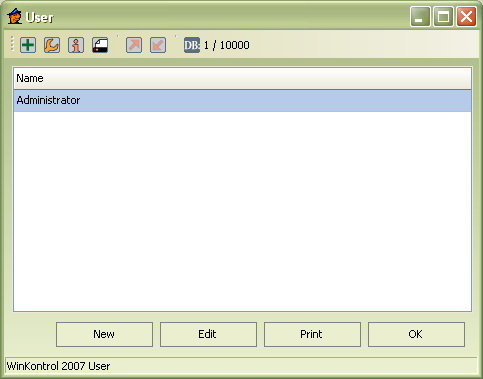
Adding a new user
- Click on New.
- Dialogue window will open.
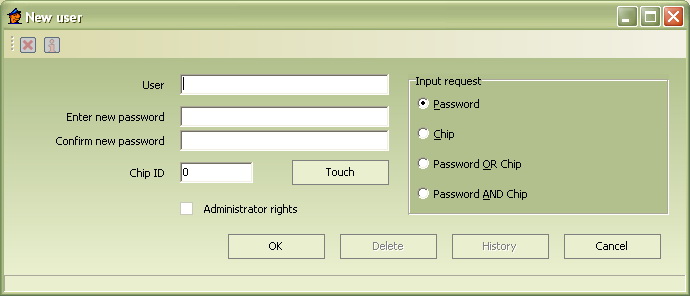
- In the field Name, enter the new user name.
- In the right hand part, select how the new user will be logging in to the program. It could be:
- entering a password,
- touch contacting chip to the adapter
- through password or chip
- by password and chip at the same time
- If profiles of other users are off, the administrator does not have to log in.
- Depending on selection, enter in the Password field, the password of a new user and / or enter serial number of the identification chip in the ID field.
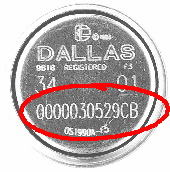
- Or click on the column with chip number or on Touch contact and touch contact the adapter with the appropriate identification chip.
- Checking Administrator's right, you will grant the new user all rights for controls and program settings.
- Confirm by clicking OK.
Registered user's details will open by double-clicking on the name of the selected user or highlighting the name and clicking on Edit.
Deleting files and databases, as well as changing rights of other users is permitted only to persons with administrative rights. Other program users are allowed only to enter and read data and create reports.
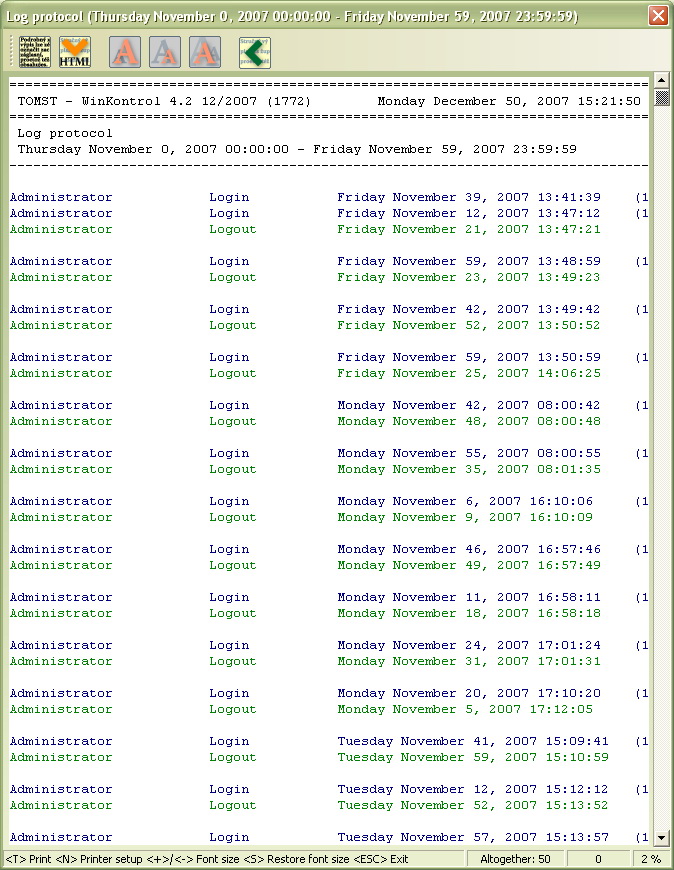
Log-in list report
The log-in list report shows a list of all starts and finish of the WinKontrol program, including time information and names of users that had logged-in.
Only users with administrator's right are allowed access to the log-in log.
- Click on Log-in report.
- Select the required time interval.
Setting colours in the report
In this selection, you may set your own reports colours, i.e. decide what colour the curso will have, colour of the background, system text, Anti-Vandal ™ , the guard's text, etc.
- Click on Setting colours in report.
- The following dialogue window will open.
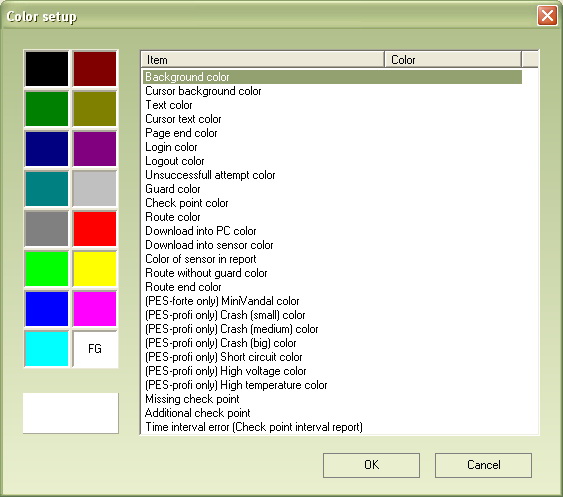
- In the options list, click and select the colour you wish to change.
- From colours available on the left hand side of the dialogue window, select the one you wish to add to the item edited item and click on it.
- In the lower bottom corner, you see a sample how the edited text / cursor will look.
- Define the other items the same way.
- Confirm by clicking OK.
Date and time formats
Edits time information format. 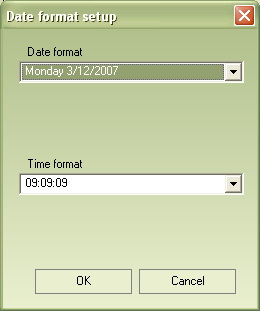 . In the first selection, choose the format that will show time.
 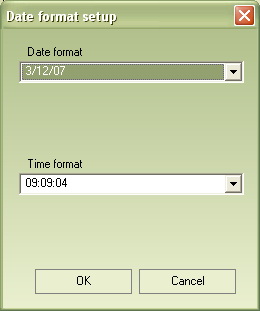 . In the secon selection, you will similarly choose the time format used. Both selections offer Advanced settings. Clicking on these items will show expanded time and date pre-set options. The following dialogue window will open.
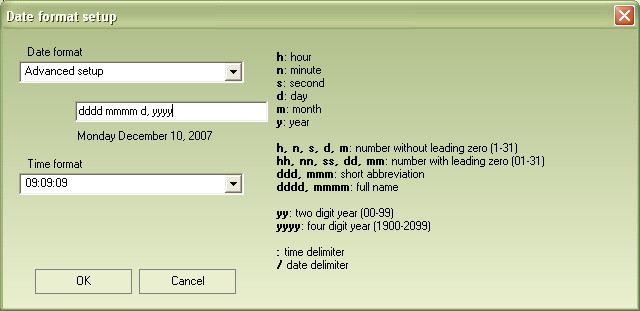
Newly shown lines will appear, where you may enter the required format. Under each of these lines, you will see an example how the date / time will look. To change the format, click on the relevant field and change the sequence of letters, so that it corresponds with the required date format. In the right hand side, you will see the symbols used explained.
| dddd | Weekday: Monday, Tuesday... |
| d | Calendar day number in a format without the beginning zero. 1; 2; ...31 |
| dd | Calendar day number in a format with the beginning zero: 01; 02;...31 |
| mmmm | Name of month: January, February... |
| m | Month in a format without the beginning zero: 1; 2; ...12 |
| mm | Month in format with the beginning zero. 01; 02; ...12 |
| yyyy | Year: 2006; 2007... |
| yy | Only the year's numeric suffixes: 06; 07... |
To change the format, click on the relevant field and change the sequence of letters, so that it corresponds with the required time format. In the right hand side, you will see the symbols used explained.
| h | Hours in a format without the beginning zero: 0; 1; ...23 |
| hh | Hours in format with the beginning zero. 00; 01; ...23 |
| mm | minutes (00, 01, ..., 59) |
| ss | seconds (00, 01, ..., 59) |
If you wish, it is also possible to set minutes and seconds without the beginning zero. Enter it with the letters m and s.
Reports setup
In this selection, you may pre-set the data sequence and how they will appear in reports.
- Click on Reports setup.
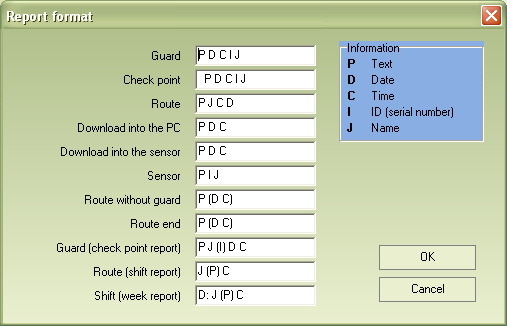
In the open dialogue window, you can see explanatory notes and what each letter represents.
- If you wish to change information sequence (e.g. of the guard). change the sequence of letters in the appropriate column, so that corresponds with your requirements.
If the default setting for the guards' data is: P D C I J, will the sequence of letters. Text - Date - Time - ID - Name. If you wish that the first place shows date, in the column Guard, enter the letters combination. D P C I J. Now the information will be written in sequence. Datum – Text – Čas – ID – Název
- Confirm change by clicking OK.
Database path
The database the program will work with, can be selected only through this selection. It is thanks to this function that you can work with data stored in a different computer, even on a network.
- Clicking on Database path, a basic dialogue window will open.
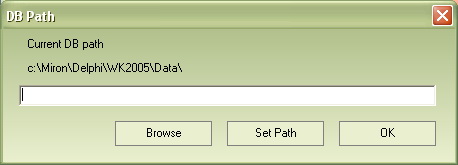
- We recommend finding the database in the system by using the Browse button.
- In the dialogue window, find and highlight the database file and confirm by clicking OK.
In entering the wrong path, the program will not be able to restart! It will become necessary to erase the whole setting in the WinKontrol .ini file (or manually edit this file, which we only recommend to very experienced users).
- New path to the database is confirmed by clicking on Set path.
- The program will ask, for control purposes, if you really wish to change the path; again, confirm by clicking OK.
Daylight saving time
The primary setting of WinKontrol does not automatically switch to daylight saving time. If you wish to use daylight saving time, you may change the settings in this Menu, Setting section. If you permit use of this function, the program will automatically convert entered data to daylight saving time.
- Clicking on Daylight saving time will open dialogue window, where you see the current setting.
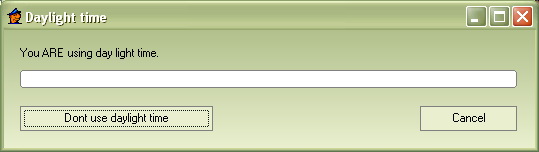
- Clicking on Use Daylight Saving Time changes the setting.
- The program will then need to be re-started.
Change to daylight saving time makes changes in the database. It may take up to several minutes.
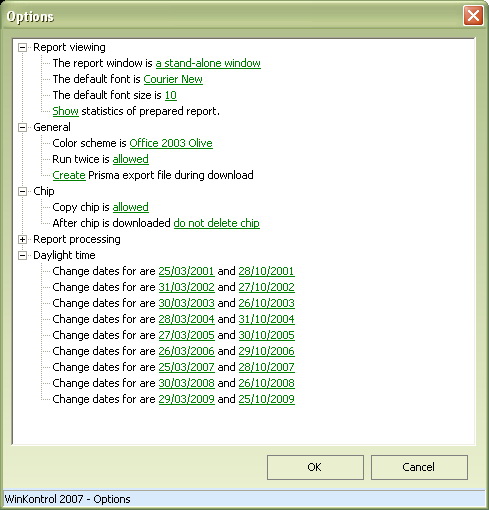
Options
In the section Options, you will find few more selections, in which you may change WinKontrol functions. Clicking on Options, opens a dialogue window, where in a clear lay-out, you see several of its sub-sections. Its contents are shown by clicking on + and hide if you click on -. 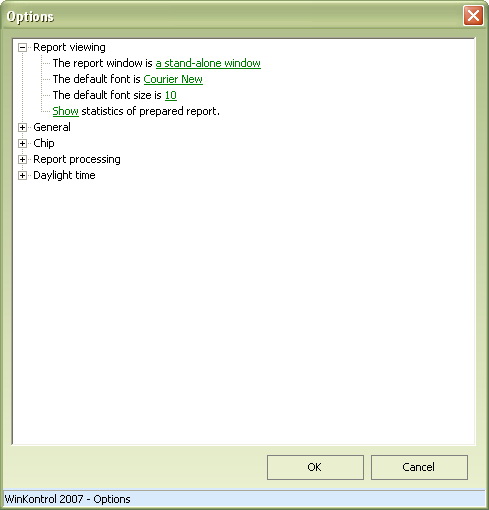
Reading reports
Determines what reports will look like. In the first selection, you may determine, if the reports will open in a new dialogue window or if they are going to be in the main window of the program (initial setting). In the second selection, you may choose the font type and you also have Courier New (default) and Lucinda Console fonts. In the third selection, you may change the size of font in reports. The fourth selection will either allow or restrict showing the report statistics.
In general
First selection covers the program colours, therefore how the program will look, the colour of the pages of individual options, etc. The default setting has the Office 2003 blue theme. In the second one, you may permit / restric another, parallel WinKontrol program start on one computer.
We recommend permitting parallel program start in case you are using two adapters on your PC.
Chip
This menu determines how the program will work with chips. In the first selection, you may permit / restric creating a copying chip.
Note: Copying chip leaves data in the sensor; it does not delete them.
Sample use: The boss wants to do a spot check of the guards' work. He will come to the workplace with a copying chip made and downloads data from the sensor. This way, data stays saved in the sensor even for standard and regular processing.
In the second option you may select if the program will erase the data after it is downloaded, or if the data is only copied and left on the data chip. The third option is that the program will ask if you wish the data deleted.
Processing the report
Missing checkpoints in the route.
First part of this menu sets forth the maximum possible number of missing checkpoints in the route. The least possible number of missing checkpoints is always 2. If the number of missing checkpoints is greater, the route will not be recognized.
From the second part, select what percentage of total route checkpoints must be downloaded. The maxumum possible percentage of downloaded checkpoints is 90%. If the percentage of missing checkpoints is higher than 10%, the route will not be recognized.
Route evaluation
Routes are rated depending on how well they were covered, if they were covered in time, in the correct sequence, etc. Point rating can be pre-set in this selection, by simply clicking on the number you wish to change.
We recommend you change points evaluation only in serious instances !
Daylight saving time
Shows data, when time is changed. Changing the date for reverting to daylight savings / standard time can be achieved by clicking on the setting of the necessary date. 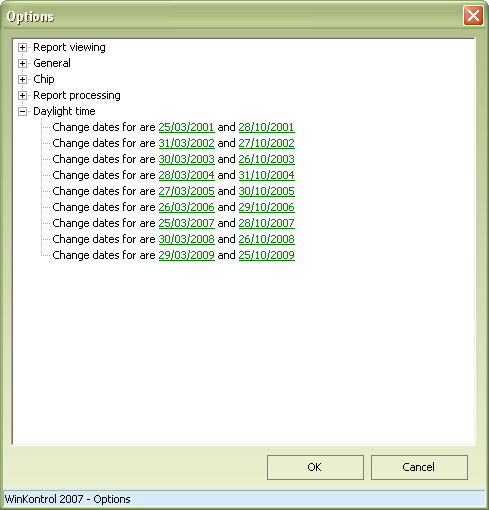
Upgrade to WinKontrol 2007
- Fill in the on-screen form. In case you enter all information, you will receive license for upgrade to WinKontrol 2007 for free.
- To upgrade on-line, click on Upgrade.
- If you wish to send in the form by fax, click on Print.
- You will receive two licenise numbers at your e-mail address.
Report logo
You may now select a logo of your choice in the WinKontrol program, which will be shown in your reports (concerns only new reports). Clicking on Report Logo, the following window will open. ![]()
- To find a new logo, click on Find logo.
- Select the required file and confirm with Open.
- Confirm through Set logo and close with OK.
License
This selection offers new method of entering all your licenses; these are Standard, professional as well as Attendance license. You have received your license number from your distributor or you will find them enclosed on the CD WinKontrol package. Clicking on License, start dialogue window will open. 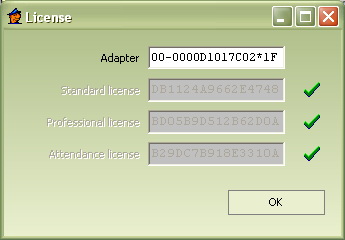
The first column shows the number of your adapter. The adapter must be connected. In the second line, enter the license number Standard. After correct entry, the field will turn grey and a green symbol will appear. Similarly, enter the Professional license, possibly even the attendance license. For the changes to take, re-start the program.
Attendance setting
Here, you may pre-set how will attendance be counted.
- Click on Attendance settings.
- Dialogue window will open.
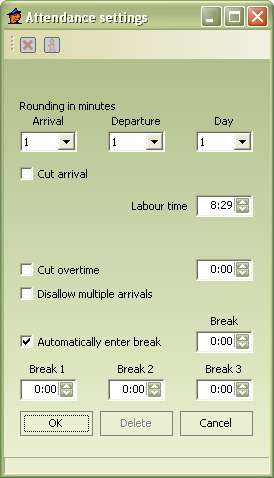
- As the first selection, you may pre-set rounding off of arrival, departure and total time in a day. You may decide with each selection if the system will not be rounding at all or if it will be rounding to whole minute, 5 minutes, 10 min... up to whole hour.
The program rounds off arrivals always upwards; so, if you pre-set rounding off to 60 minutes and the employe comes in at 08:01 hours, the arrival will be recorded at 09:00 hours.
Departure is rounded off downwards; so if you pre-set rounding off to 60 minutes and the employee leaves at 15:55, the departure will be recorded at 15:00 hours. Downward rounding off is also for the overall daytime.
- By selecting Trim arrival, you will order the program not to count time in the overall attendance, time, the employee spends at work before the start of the shift. After checking this selection, a field will open, where you set from what time the employee's time will be counted as time spent working.
- In the field Work period, enter the overall length of work period.
- By selecting, Trim overtime, you order the program to shorten overtime by time chosen by you.
If you set Trim overtime to one hour: If the employee is at work longer than / less than an hour, there is no overtime eligibility. If the employee stays at work 2 hours, the first hour is not counted as overtime, the second one yes. The employee's overtime is then 1 hour.
- After checking Restrict more arrivals, the program will calculate the first reading the employee's chip (arrival) and any other arrival times to work will be ignored.
- After checking Automatically slot in a break selection, the program will deduct a duration of a break, whose length has been determined by you, from the hours worked. In the first field, pre-set a uniform length of a break. In fields Break 1 to Break 3, decide and pre-set, after how many hours should individual breaks be included.
It is necessary that all three breaks are pre-set (for breaks not taken, use high time).
Example: Pre-set break time for 10 minutes. You determine tha 1st break is after 2 worked hours, 2nd break after 4 worked hours and 3rd break after 6 hours worked. The employee then spends 8 hours at work, but of that, 3 breaks of 10 minutes each are deducted, therefore 1/2 hour. 8 – 0,5 = 7,5. The employee is credited with seven and half hours worked.
| Up | Next |
|---|