WinKontrol 2007
- Content
- Introduction
- Necessary HW and operating system
- Instructions for experienced PC users
- Installation
- First start and WinKontrol Program setting
- Working with WinKontrol Program
- Data
- Report
- Chip
- Settings
- Information
- Licence, warranty
- WK Downloader
- ANTI-VANDAL®
- Working with sensors
- Uninstalling
- Technical parameters
- Quick course for basic work
Chip
This menu is used to work with chips, reading them, settings, testing and also updates of firmware, sensors and adapters. We will cover individual functions in this chapter.
Functions from the Chip menu work closely with the adapter. If the adapter is not properly pre-set, these functions do not work and the program works only in trial mode version.
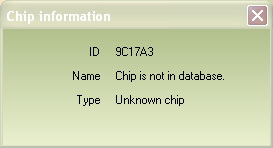
Chip information
The function serves for simple indentification of chips (and sensors).
- Click on Chip informationor the
 icon.
icon.
- After you are asked, touch-contact the chip you wish to identify with the adapter.
- A dialogue window, containing the chip serial number, the chip type and in case the chip is in the database, its name will appear also.
- Close the window by hitting the ESC key.
Downloading the chip
This is the starting function for information transfer from the data chip or the sensor, into the computer.
- This will transfer data from the sensor to the data chip (only if you are not transferring data directly through the TMD adapter).
- Click on Download chip or the
 icon.
icon.
- You will be asked to touch-contact the chip or sensor.

- Touch-contact the data chip or sensor with the adapter. Wait until the system confirms transfer of all data.
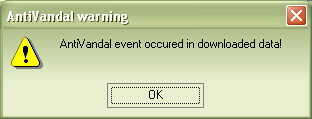
- In the event that there were attempts to destroy (damage) the sensor, you will be immediately notified by the Anti-Vandal ® system and the following window will appear.
- After clicking OK, a dialogue window will open, which will inform you that data was downloaded successfully, the number of recorded events, time interval when they were recorded and if the data chip memory was deleted.
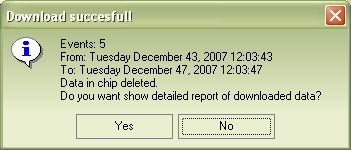
Data will appear as detailed report.
- If you wish to see the downloaded data immediately, click on Yes.
- If you wish to see the data later, close the window by clicking on No.
Chip settings
Data chip may fulfil three basic functions, which can be pre-set in this menu. These are:
- Transfer function - in this mode, the data chip can transfer data from sensors to the computer.
- Time chip function - this setting is used in updates / time changes in the sensor. It can be used to set forward time.
Time in the chip does not change. If you know that you will reach the sensor in an hour, you may pre-set the time one hour later and in an hour, time in the chip will update exactly.
- Copy chip function - the copy chip is used in data transfer from the sensor to PC but (as opposed to data transfer chip) leaves data in the sensor. This selection, in relation to Settings does not have to be visible.
Sample use: The company owner decides on a spot check and wants to copy the sensor data into his own PC, without upsetting the system of regular data retrieval and controls. He will then use the copy chip to copy the data from the sensor. The data will remain in the sensor for normal processing.
Pre-setting a function in a data chip is done as follows:
- Click on Setup chip or the
 icon.
icon.
- Dialogue window will open.
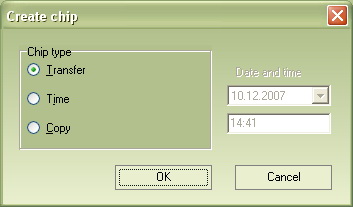
- Select what type of chip you wish to create.
- If you select Time chip, check / pre-set the correct time in the right-hand half of the dialogue window.
- Confirm by clicking OK.
- After you are asked, touch-contact the appropriate data chip with the adapter.
- Wait, until the system confirms successful chip setting.
Upgrading sensor's firmware
Sensors PES © make firmware upgrades possible, or the sensor's internal operating system which controls its functions. This for example makes possible improvements to the sensors' abilities, add new functions, etc. With selection of this option in WinKontrol, you may copy the firmware to your sensors.
Registered users will be infomed about available upgrades for sensors.
- From the source you were informed about by your distributor, download new formware and save it in your computer (these are files with the *.tup suffix).
- Click on Upgrade sensor firmware. A dialogue window for file selection will open.
- In this window, find new firmware saved file, highlight it and click on Open.
- After you are asked, touch-contact the appropriate data chip with the adapter.
- After installing firmware in the chip, touch-contact the chip to the sensor.
If you are using new sensors where the serial number begins with the number 3, the upgrade can only be done through TMD adapter.
Processing saved data (WK Downloader)
The WinKontrol ® program processes data that were downloaded into a different computer, other than where the WinKontrol is installed. Downloading data from a different computer is done through the WK Downloader. With this program (and an installed adapter) you may download data from your data chip, for example, to a diskette, or send it by e-mail.
WK Download is not standard in the PES system; it may be purchased from our distributors.
If you need process data from a different computer, do the following:
- If you have data saved on a diskette or a CD, insert it in a PC with WinKontrol ® program installed.
- If the data was sent to you by e-mail, save them in your computer.
- In WinKontrol, click on Processing saved data.
- In the open dialogue window, highlight the file with saved data and confirm by clicking on Open.
- The program will now read-in and process the data.
Sample use: If you wish to evaluate data on a different computer than the one you have available at the guards' workplace, install the WK Downloader with adapter, through which you will be reading-in the data contained in sensors. Save data on portable medium or send it through e-mail and process it on your PC with the WinKontrol program installed.
Data chip test
If you suspect that some chip does not work properly, where, for example, there are problems with data transfer, you can test the chip with this function.
- Click on Data chip test.
- After you are asked, touch-contact the tested chip to the adapter and hold it there firmly, while the test is underway (you will see the progress on the screen).
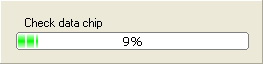
The test may take up to 5 minutes! The chip must be held firmly on the adapter for the whole time. Should there be a short interruption in contact, the program may rate the chip as defective.
- In the end, the program will automatically inform about the results.
Upgrading adapter firmware
The WinKontrol program checks on every start for firmware availability for your adapter. In case new firmware is available, the program will notify you. You will be asked if you want to upgrade immediately. If not, you will be asked next time the program starts. Or, the controls and firmware upgrade may started later, by selecting Upgrade adapter firmware.
- Click on Upgrade adapter firmware.
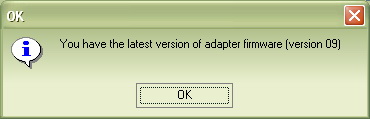
- A dialogue window will open, where the program will inform you that you are using the latest firmware version.
- Or, a new firmware is available.
- In that case, the program will upgrade the adaptor firmware.
| Up | Next |
|---|