WinKontrol 2007
- Content
- Introduction
- Necessary HW and operating system
- Instructions for experienced PC users
- Installation
- First start and WinKontrol Program setting
- Working with WinKontrol Program
- Data
- Report
- Chip
- Settings
- Information
- Licence, warranty
- WK Downloader
- ANTI-VANDAL®
- Working with sensors
- Uninstalling
- Technical parameters
- Quick course for basic work
Installation
In the event that you are new user of the PES® system and WinKontrol ® program, it is necessary that you first install an adapter on the computer that will process data from the PES control system and then the WinKontrol ® program. In this chapter, you will find the instructions to both installations. Similarly you will find the procedure here to upgrade from an older version of WinKontrol.
Recommendations: Prior to installation, restart your computer.
Adapter installation
What is a port? Port is the part of PC, where peripherals are connected.
There are four types of adapters: TMA and TMC adapters for serial ports and TME and TMD for USB ports.
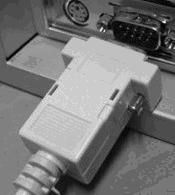
Installation of TMA and TMC adapters:
- Connect the adaptor connector into the serial port of your computer.
- Continue Installation of WinKontrol program.
Installation of TME adapter
- Connect the adaptor into the serial port of your computer.
These ports are normally placed on the back of the computer, and some PC types have them also on the front panel.
- After the correct connection of the adapter, your Windows system will notify you that it had found new hardware (you will get a notification in the bottom right hand corner of your monitor), and the installation wizard for newly recognized hardware will appear.
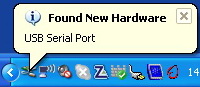
In case that it does not happen automatically, click on the new HW bubble. Older version of Windows will not recognize new device. It is necessary to use the New Hardware Installation Wizard (open Start – Settings – Control Panel – Add new hardware).

- Microsoft does not offer any drivers for this hardware and all necessary software is on the CD which comes with the adapter.
- Do not close the open installation Wizard; insert the installation disk in the CD drive.
- Now, check second option Install from a Directory or list
- Click on Next.
- Next, select Find the best driver in this list and check Search removable media such as diskette or CD-ROM.
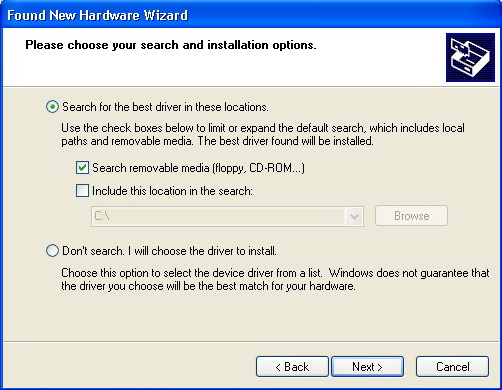
- Click on Next.
- The operating system will now notify you that the SW you wish to install was not tested by Microsoft.
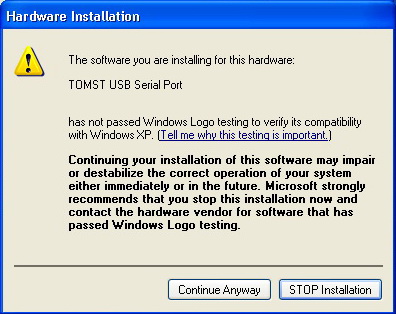
- Ignore this caution and click on Next.
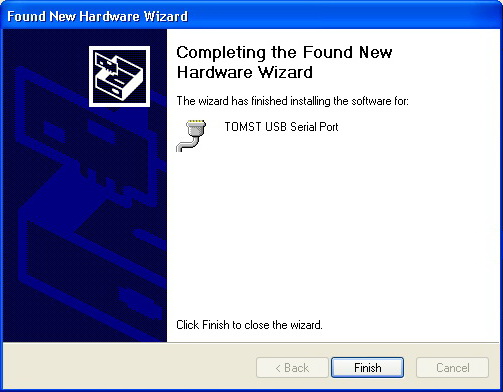
- Wait until the installation is finished. You will see a following dialogue window.
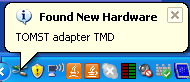
- The installation program has now created a virtual COM port (VCP), the adapter will connect to from this moment on. This is why, as soon as the installation is finished, Windows will notify you that new hardware has been found (own adapter).
- Installation Wizard will appear again in the newly recognized HW.
In case that it does not happen automatically, click on the new HW bubble. Note: Older version of Windows will not automatically recognize new devices. It is necessary to use the installing New Hardware Installation Wizard (open Start – Settings – Control Panel – Add new hardware).
- If you removed it, re-insert the installation CD back into the CD drive.
- Continue with selection Install from Directory.
- Click on Next.
- Next, select Find the best driver in this list and check Search removable media such as diskette or CD-ROM.
- Click on Next.
- The operating system will again notify you that the installed SW was not tested by Microsoft.
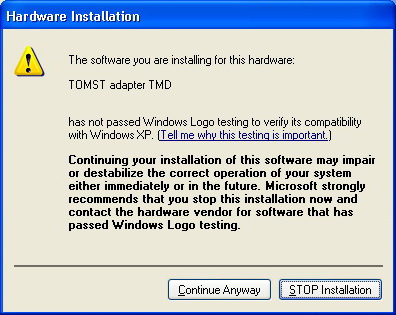
- Do not worry and click on Next.
- Wait until the installation is finished. You will see the following dialogue window.

- Click on Finish.
- Now you have to check the settings of newly created virtual port in the Device Manager.
Device Managercan be open in three possible ways:
- Press both Window and Pause / Break key on your keyboard, select Hardware tab and click on Device Manager.
- On the Windows desktop, right click on This Computer, select Properties, next Hardware tab and Device Manager button.
- Click on Start, then Control Panel. A double click will open item System, then the tab Hardware and then Device Manager.
- In the list Device Manager, open the ports description and locate item TOMST® USB Serial Port.
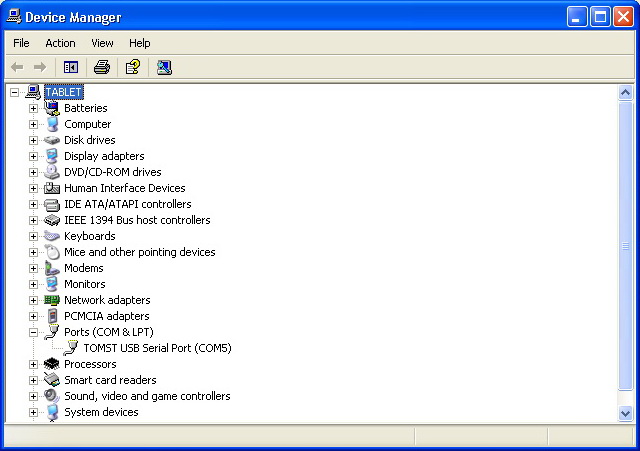
In order that it functions well, the USB adapter must be installed on a port with number lower than 10. If it is installed properly and the number is smaller than 10, the program will remember the port number (COM3, COM4…) and continue with WinKontrol program installation. If the COM port is higher than 9, the WinKontrol ® program won’t be able to communicate with the adapter and will report that it cannot establish communication and will start in the trial mode. In this case, the virtual port setting has to be changed.
Setting virtual COM ports
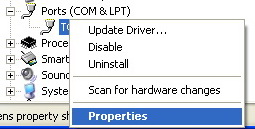
- In Device manager, right click on the TOMST® USB Serial Port icon.
- Select Properties.
- Click on the Port Settings tab.
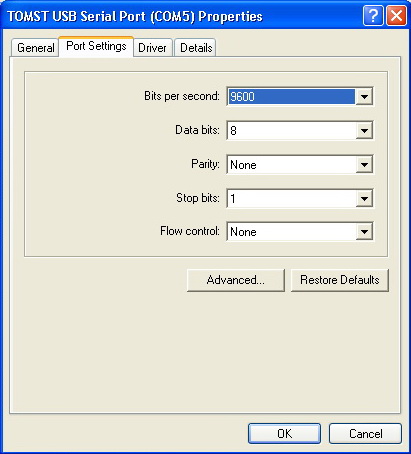
- Select Advanced.
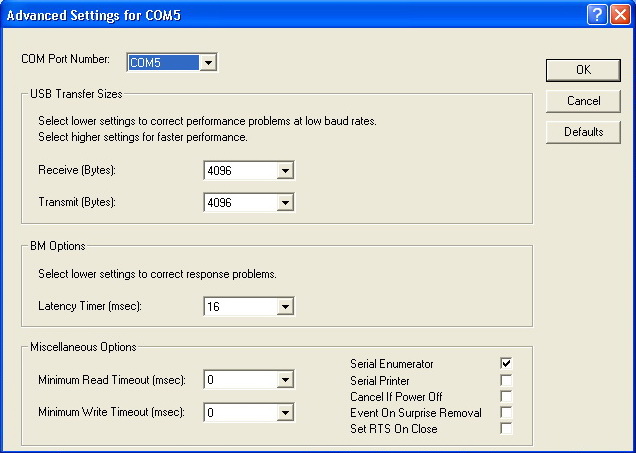
- Under COM Port Number, select different available port.
- Confirm by clicking OK.
Before selecting a different port, check and see in the Device Manager if the port with this number is not used by different device: its number must not be shown in brackets in any of the items shown.
- After setting, continue with Program WinKontrol installation.
Installing the TMD adapter
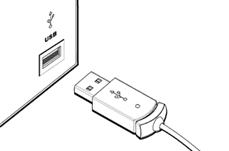
- Connect the adaptor into the USB port of your computer.
These ports are normally placed on the back of the computer, and some PC types have them also on the front panel.
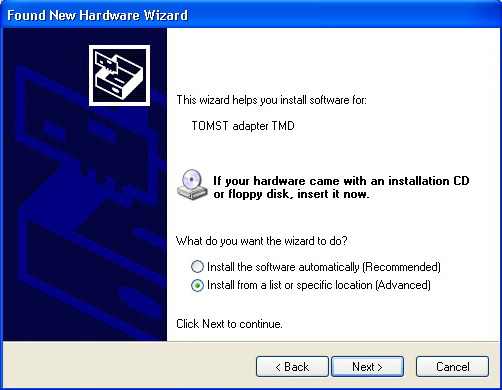
- After correctly connecting the adapter, your Windows system will notify you that it had found new device (you will get a notification in the bottom right hand corner of your monitor), and the Installation Wizard for newly recognized HW will appear.
In case that it does not happen automatically, click on the New Device Found bubble. Older version of Windows will not automatically recognize the new device. It is necessary to use the installing new hardware Wizard (open Start – Settings – Control Panel – Add new hardware).
- Microsoft does not offer any drivers for this hardware. All necessary drivers can be found on the CD, which comes with the adapter.
- Do not close the open Installation Wizard and insert the installation disk in the CD drive.
- Now, select a second option: Install from a Directory or list.
- Click on Next.
- Next, select Find the best driver in this list and check earch removable media such as diskette or CD-ROM .
- Click on Next.
- The operating system will now notify you that the SW you wish to install was not tested by Microsoft.
- Ignore this caution and click on Next.
- Wait until the installation is finished. The following dialogue window will appear.
- Click on Finish.
In case of this type of adapter, you don’t have to verify or set the port number.
Troubleshooting for possible installation problems
Computer does not recognize the USB adapter
In case your computer cannot recognize the adapter, disconnect it from the USB and wait approx. 15 seconds and reconnect the adapter. If the system does not recognize new device, disconnect the adapter and shut off the computer. Wait approx. 15 seconds and re-start the computer. Reconnect the adapter. If your system still does not recognize the device, contact your technical support or the adapter manufacturer.
Interrupting the installation:
If for some reason, installation of USB TME adapter is interrupted, you must first uninstall the driver and reinstall it again.
- Disconnect the adapter and insert the USB adapter installation CD-ROM disk.
- Either through Explorer, Total Commander or through This Computer – Item CD-ROM (DVD-ROM) - open the directory on the installation CD disk.
- Find and select FTDUNIN.EXE file and double-click on it
- This application will remove all remaining driver parts.
- Start new installation.
Installation of WinKontrol®
Once you have installed the adapter, you can install the program.
- Insert the WinKontrol program installation CD-ROM into the CD drive. Introduction screen and dialogue window will appear automatically.
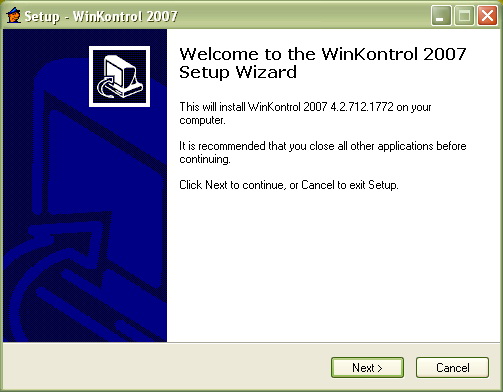
- Click on Next.
- In the next dialogue window, you can select a different location of the directory, where you wish the program installed.
- You can make the change manually in the directory you want, or use the Browse button (we recommend this, if you wish to change the files location).
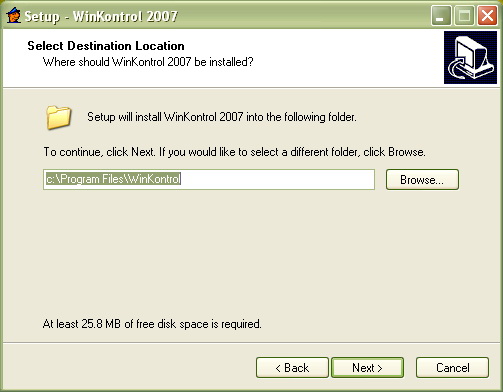
- Confirm new location and continue through Next..
As opposed to previous versions you do not have to select installation type. Installation type will be selected automatically.
- In the next selection Start, you can choose, where the proxy will be located, through which the program will start.
- With the Browse button, you can select the directory, where the proxy will be installed. If you leave the installer to create a new directory in Start (initial setting) you can rename the directory on the line.
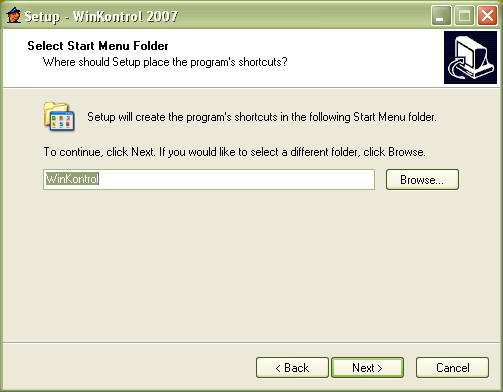
The initial setting in Start, a WinKontrol directory will be created, where the proxy will be installed.
- Click on Next.
- Now, select where the program should install the other proxies:
- Selection Create Proxy on Desktop will create an icon on the Desktop.
- Create Proxy in quick start selection will add an icon to the bottom menu bar in Windows.
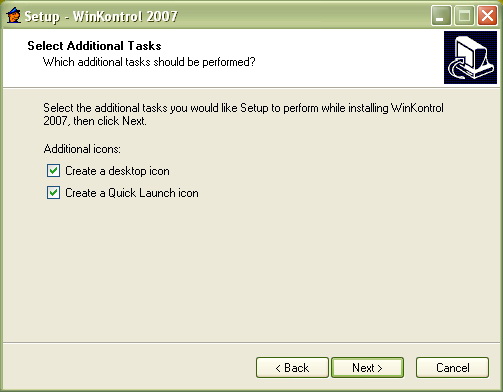
- Click on Next.
- Installation is now ready. Final overview will appear.
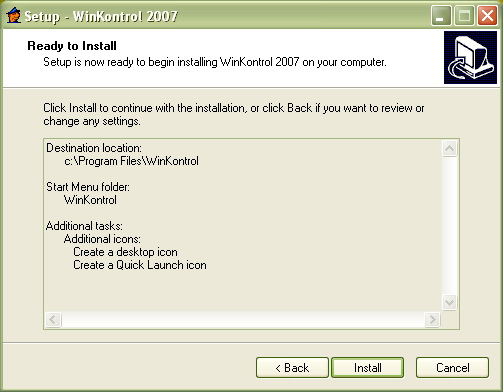
- If you wish to change any part of the installation, click on the Back button.
- If you don’t wish to make any changes, click on Install.
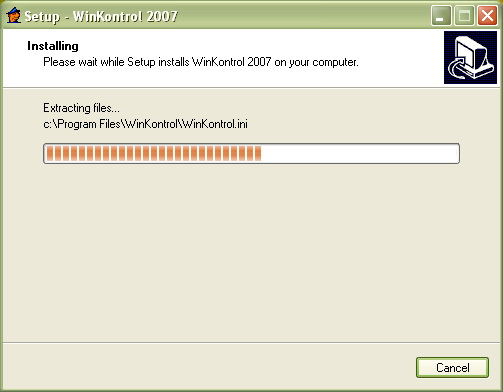
- Wait for the installation to finish.
- After it finishes, a dialogue window will appear:
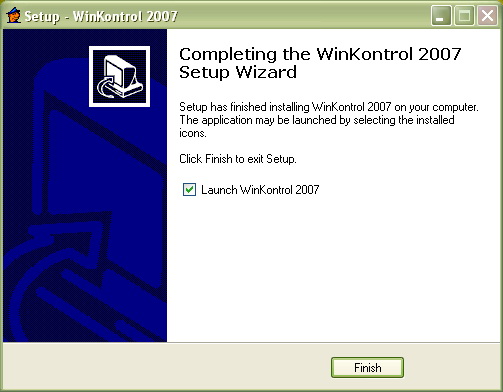
- If you leave the selection Start WinKontrol 2007 checked, the program will start immediately after installation is finished.
- Finish installation by clicking on Finish.
If you have upgraded from WinKontrol for DOS, the old database will not be automatically transferred. In this case, contact your distributor.
If you have upgraded from older version for Windows (e.g. WinKontrol 2004), you have to convert the database (see the next chapter).
Old database conversion
This step concerns only users of WinKontrol 2000, WinKontrol 2004 and older WinKontrol WK3 versions (until 2005). In newer versions, database does not have to be converted
- Start WinKontrol 2007.
- On program start, you will see a notice that you are using older database version and database conversion will be started.
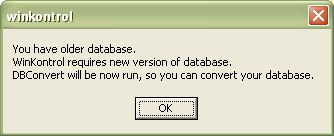
- Click on OK.
- The following dialogue window will appear.
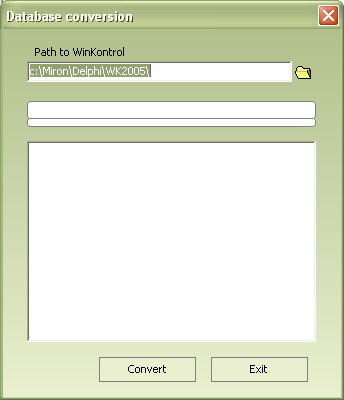
- If the path shown to the directory containing the database is correct, click on Convert. If your database is located elsewhere, find it in your system and confirm.
- The conversion will start. Wait until it is finished. The process may take a while.
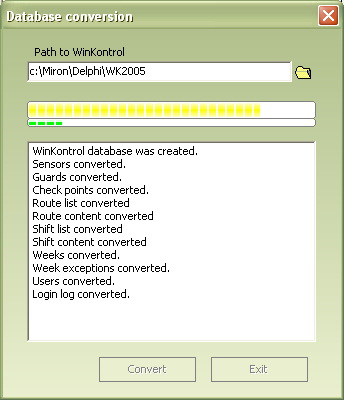
- When the conversion is finished, the upper indicator will turn red and buttons become active again.
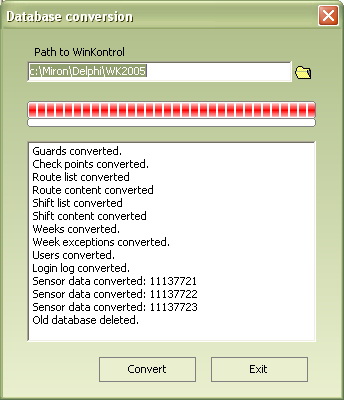
- Close the windows by clicking on Finish.
| Up | Next |
|---|